Suzuki GSX-R 1000 Service Manual: Clutch parts inspection
Refer to “clutch removal” and “clutch installation” .
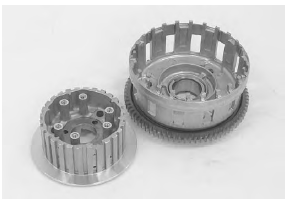
Clutch drive and driven plate
| Note wipe off the engine oil from the drive and driven plates with a clean rag. |
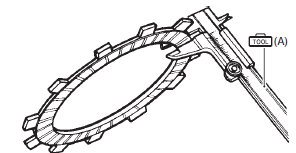
Measure the thickness of drive plates with a vernier calipers. If the drive plate thickness is found to have reached the limit, replace it with a new one.
Special tool
 (a): 09900–20102 (vernier calipers
(200 mm))
Clutch drive plate thickness service limit (no. 1 And no. 2 Drive plates): 2.92 Mm (0.115 In)
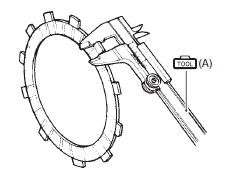
Measure the claw width of drive plates with a vernier calipers. Replace the drive plates found to have worn down to the limit.
Special tool
( a): 09900–20102 (vernier calipers
(200 mm))
Clutch drive plate claw width service limit (no. 1 And no. 2 Drive plates): 12.90 Mm (0.508 In)
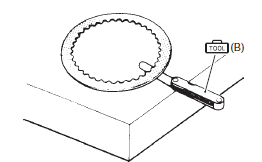
Measure each driven plate for distortion with a thickness gauge and surface plate.
Replace driven plates which exceed the limit.
Special tool
 (b): 09900–20803 (thickness gauge)
Clutch driven plate distortion service limit (no. 1, No. 2 And no.3 Driven plates): 0.10 Mm (0.004 In)
Clutch spring
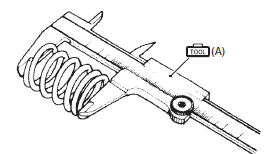
Measure the free length of each coil spring with a vernier calipers, and compare the length with the specified limit.
Replace all the springs if any spring is not within the limit.
Special tool
 (a): 09900–20102 (vernier calipers
(200 mm))
Clutch spring free length service limit: 55.3 Mm (2.18 In)
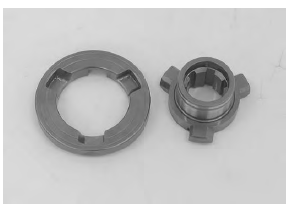
Clutch release bearing
Inspect the clutch release bearing for any abnormality, especially cracks. When removing the bearing from the clutch, decide whether it can be reused or if it should be replaced.
Smooth engagement and disengagement of the clutch depends on the condition of this bearing.
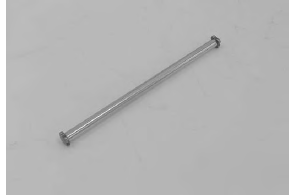
Push rod (right)
Inspect the push rod for wear and damage.
If any defects are found, replace the push rod with a new one.
Clutch sleeve hub and primary driven gear assembly
Inspect the slot of the clutch sleeve hub and primary driven gear assembly for damage or wear caused by the clutch plates. If necessary, replace it with a new one.
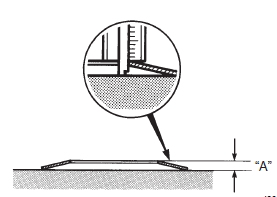
Wave spring washer
Measure the free height “a” of each wave spring washer with a vernier calipers.
If each wave spring washer height “a” is not within the specified limit, replace it with a new one.
Special tool
 : 09900–20102 (vernier calipers (200
mm))
Wave spring washer height “a” service limit: 4.30 Mm (0.169 In)
Clutch lifter drive cam and clutch lifter driven cam
Inspect the clutch lifter drive cam and clutch lifter driven cam for wear and damage. If any defects are found, replace the clutch lifter drive cam or clutch lifter driven cam.
 Clutch installation
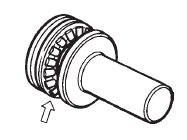
Install the primary driven gear assembly (1).
Caution
if it is difficult to install the primary driven
gear, rotate the crankshaft.
Be sure to engage the oil pump ...
 Clutch lifter pin inspection and adjustment
Refer to “clutch removal” and “clutch installation” .
Note
when inspection and adjusting the clutch
lifter pin, it is not necessary to install the
clutch onto the countershaft.
...
Other materials:
Cooling fan relay inspection
Inspect the fan relay in the following procedures:
remove the frame covers. Refer to “exterior parts
removal and installation” in section 9d (page 9d-
6).
Remove the cooling fan relay (1).
First check the insulation between “a” and “b”
terminals with tester. Then ap ...
Oil pump removal and installation
Note
be careful not to drop any parts into the
crankcase.
Removal
Remove the oil pan, oil pressure regulator and oil strainer. Refer to
“oil pan / oil pressure regulator / oil strainer removal and installation” .
Remove the oil pump driven gear bolt (1).
Rem ...
Tp sensor adjustment
Inspect the tp sensor setting position and adjust it if
necessary in the following procedures:
connect the special tool (mode select switch) to the dealer mode
coupler. Refer to “self-diagnostic procedures” in section 1a .
Special tool
: 09930–82720 (mode selection switch)
Warn ...