Suzuki GSX-R 1000 Service Manual: Piston and piston ring inspection
Refer to “piston ring removal and installation” .
Piston diameter
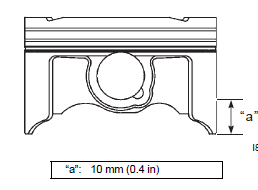
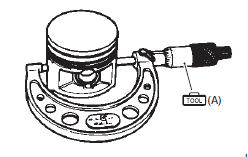
Measure the piston diameter using the micrometer at 15 mm (0.6 In) “a” from the skirt end. If the piston diameter is less than the service limit, replace the piston.
Special tool
 (a): 09900–20203 (micrometer (50 –
75 mm))
Piston diameter service limit: 74.380 Mm (2.9283 In)
Piston-to-cylinder clearance
Subtract the piston diameter from the cylinder bore diameter. If the piston-to-cylinder clearance exceeds the service limit, replace both the cylinder and the piston.
Piston-to-cylinder clearance service limit: 0.120 Mm (0.0047 In)
Piston ring-to-groove clearance
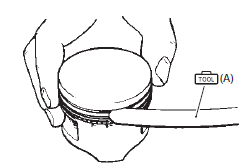
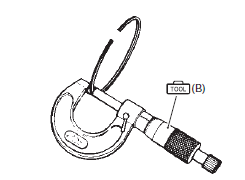
Measure the side clearances of the 1st and 2nd piston rings using the thickness gauge. If any of the clearances exceed the limit, replace both the piston and piston rings.
Special tool
 (a): 09900–20803 (thickness gauge)
 (b): 09900–20205 (micrometer (0 – 25
mm))
Piston ring-to-groove clearance service limit (1st): 0.180 Mm (0.0071 In) service limit (2nd): 0.150 Mm (0.0059 In)
Piston ring groove width standard (1st): 0.83 – 0.85 Mm (0.0327 – 0.0335 In) standard (1st): 1.30 – 1.32 Mm (0.0512 – 0.0520 In) standard (2nd): 0.81 – 0.83 Mm (0.0319 – 0.0327 In) standard (oil): 1.51 – 1.53 Mm (0.0594 – 0.0602 In)
Piston ring thickness standard (1st): 0.76 – 0.81 Mm (0.0299 – 0.0319 In) standard (1st): 1.08 – 1.10 Mm (0.0425 – 0.0433 In) standard (2nd): 0.77 – 0.79 Mm (0.0303 – 0.0311 In)
Piston ring free end gap and piston ring end gap
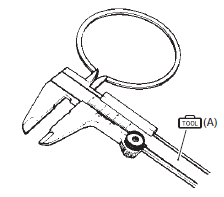
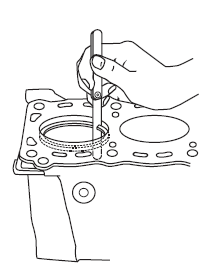
Measure the piston ring free end gap using vernier calipers. Next, fit the piston ring squarely into the cylinder and measure the piston ring end gap using the thickness gauge. If any of the measurements exceed the service limit, replace the piston ring with a new one.
Special tool
 (a): 09900–20102 (vernier calipers
(200 mm))
Piston ring free end gap service limit (1st): 5.6 Mm (0.22 In) service limit (2nd): 6.4 Mm (0.25 In)
Special tool
 (b): 09900–20803 (thickness gauge)
Piston ring end gap service limit (1st): 0.50 Mm (0.020 In) service limit (2nd): 0.50 Mm (0.020 In)
Piston pin and pin bore
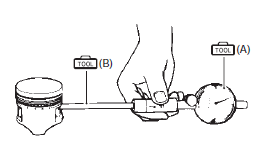
Measure the piston pin bore inside diameter using the small bore gauge. If either is out of specification or the difference between these measurements surpass limits, replace the piston.
Special tool
 (a): 09900–20602 (dial gauge)
 (b): 09900–22401 (small bore gauge
(10 – 18
mm))
Piston pin bore service limit: 15.030 Mm (0.5917 In)
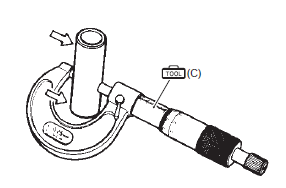
Measure the piston pin outside diameter at three positions using the micrometer. If any of the measurements are out of specification, replace the piston pin.
Special tool
 (c): 09900–20205 (micrometer (0 – 25
mm))
Piston pin o.D.
Service limit: 14.980 Mm (0.5898 In)
 Piston ring removal and installation
Removal
Remove the piston. Refer to “engine bottom side disassembly” .
Carefully spread the ring opening with your thumbs
and then push up the opposite side of the 1st ring to
remove i ...
 Balancer shaft disassembly and assembly
Refer to “engine bottom side disassembly” (page 1d-
49).
Refer to “engine bottom side assembly” .
Disassembly
Remove the balancer shaft. Refer to “engine bottom side disassembly” .
Re ...
Other materials:
Dimmer / passing light switch inspection
Inspect the dimmer/passing light switch in the following
procedures:
remove the air cleaner box. Refer to “air cleaner box removal and
installation” in section 1d .
Disconnect the left handlebar switch coupler (1).
(Yellow)
Inspect the dimmer/passing light switch ...
Exterior parts removal and installation
Side frame cover
Removal
Note
the left and right side frame covers are
installed symmetrically and therefore the
removal/installation procedure for one side is
the same as that for the other side.
Remove the bolt (1).
Remove the side frame cover (2).
...
Short circuit check (wire harness to ground)
Disconnect the negative (–) cable from the battery.
Disconnect the connectors/couplers at both ends of
the circuit to be checked.
Note
if the circuit to be checked branches to other
parts as shown, disconnect all connectors/
couplers of those parts. Otherwise, diagnos ...
