Suzuki GSX-R 1000 Service Manual: Swingarm related parts inspection
Refer to “swingarm removal and installation” (page 2c- 9).
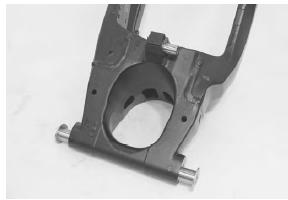
Spacers
- Remove the collar and spacer from the swingarm.
- Inspect the collars and spacer for wear and damage.
If any defects are found, replace them with new ones.
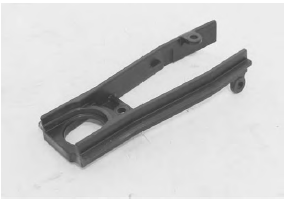
Chain buffer
Inspect the chain buffer for wear and damage. If any defect is found, replace the chain buffer with a new one.
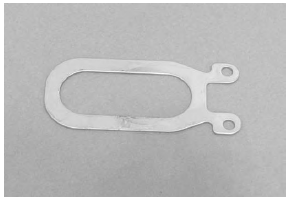
Plate
Inspect the plate for damage and excessive bend. If any defect is found, replace the plate with a new one.
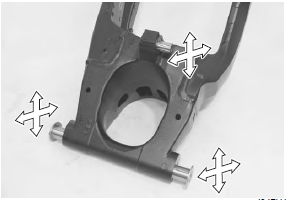
Swingarm bearing
- Insert the collars and spacer into bearings.
- Check the play by moving the collars and spacer up and down. If excessive play is noted, replace the bearings with new ones. Refer to “swingarm bearing removal and installation” .
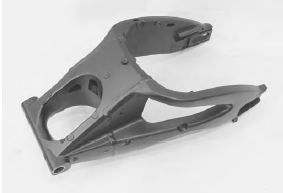
Swingarm
Inspect the swingarm for damage. If any defect is found, replace the swingarm with a new one.
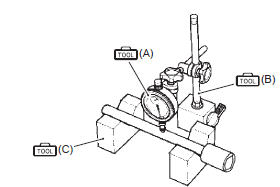
Swingarm pivot shaft
Measure the swingarm pivot shaft runout using the dial gauge. If the runout exceeds the service limit, replace the pivot shaft.
Special tool
 (a): 09900–20607 (dial gauge)
 (b): 09900–20701 (dial gauge
chuck)
 (c): 09900–21304 (v blocks)
Swingarm pivot shaft runout service limit: 0.3 Mm (0.01 In)
 Swingarm pivot boss removal and installation
Removal
Remove the swingarm. Refer to “swingarm removal and installation” .
Remove the swingarm pivot boss nut (1).
Note
remove the swingarm pivot boss only when
replacing ...
 Swingarm bearing removal and installation
Removal
Remove the swingarm. Refer to “swingarm removal and installation” .
Remove the swingarm pivot bearings (1) using the
special tool.
Special tool
(a):
09921–20240 (bearing re ...
Other materials:
Cam chain guide / cam chain tensioner
removal and installation
Removal
Remove the cylinder head cover. Refer to “engine top side disassembly” .
Remove the cam chain guide no. 2 (1).
Remove the cylinder head. Refer to “engine top side disassembly”
and “engine bottom side disassembly” .
Remove the starter clutch. Refer to “s ...
Side standngnition interlock switch
Check the side stand/ignition
interlock system for proper operation
as follows:
Sit on the motorcycle in the
normal riding position, with the
side stand up.
Shift into first gear, hold the
clutch in, and start the engine.
While continuing to hold the
clutch in ...
Rear shock absorber disposal
Refer to “rear shock absorber removal and installation” .
The rear shock absorber unit contains high-pressure
nitrogen gas.
Mishandling can cause explosion.
Keep away from fire and heat. High gas
pressure caused by heat can cause an
explosion.
Release gas ...