Suzuki GSX-R 1000 Service Manual: Ecm removal and installation
Removal
- Remove the frame covers. Refer to “exterior parts removal and installation” in section 9d (page 9d- 6).
- Disconnect the battery (–) lead wire.
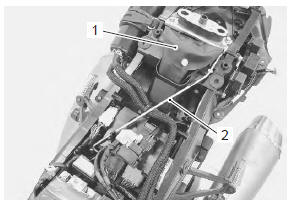
- Remove the tool set (1) and prop stay (2).
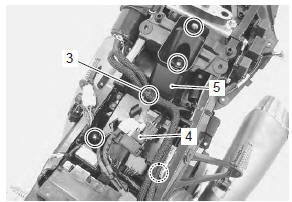
- Disconnect the hose clamp (3) (e-33 only) and starter relay (4).
- Remove the electric parts holder bracket (5).
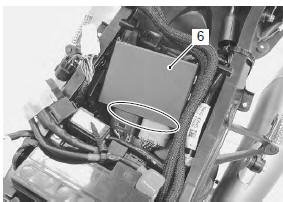
- Disconnect the couplers and remove the ecm (6).
Installation
Install the ecm in the reverse order of removal.
Cmp sensor inspection
Refer to “dtc “c11” (p0340): cmp sensor circuit malfunction” in section 1a .

 Cmp sensor removal and installation
Removal
Remove the air cleaner box. Refer to “air cleaner box removal and
installation” in section 1d .
Remove the pair control solenoid valve. Refer to “pair control solenoid
valve ...
Other materials:
Gearshift lever construction
Gearshift lever bracket
Gearshift lever shaft
Washer
Snap ring
Gearshift lever
Footrest top surface
65 – 75 Mm (2.6 – 3.0 In)
28 N·m (2.8 Kgf-m,
20.0 Lbf-ft)
40 N·m
(4.0 Kgf-m, 29.0 Lbf-ft)
Apply grease.
Grease.
...
Horn inspection
Note
if the horn sound condition is normal, it is not
necessary to inspect the horn button
continuity.
Horn button inspection
Remove the air cleaner box. Refer to “air cleaner box removal and
installation” in section 1d .
Disconnect the left handlebar switch lead ...
Brake fluid replacement
Caution
handle brake fluid with care: the fluid reacts
chemically with paint, plastic, rubber
materials, etc.
Front brake
Place the motorcycle on a level surface and keep the
handlebars straight.
Remove the brake fluid reservoir cap and
diaphragm.
Suck u ...