Suzuki GSX-R 1000 Service Manual: Rear brake master cylinder disassembly and assembly
Refer to “rear brake master cylinder assembly removal and installation” .
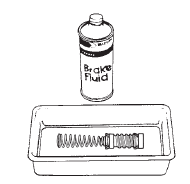
Disassembly
- Disconnect the reservoir hose (1).
- Remove the lock-nut (2).
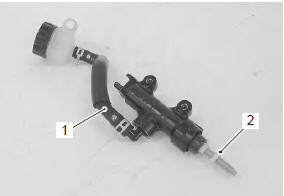
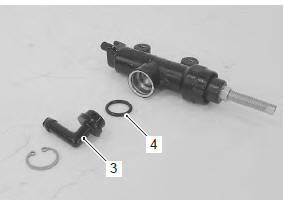
- Remove the brake hose connector (3) and o-ring (4).
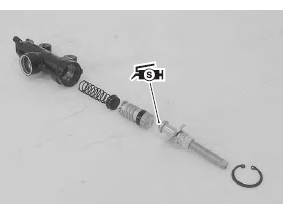
Special tool
 : 09900–06108 (snap ring remover
(close
type))
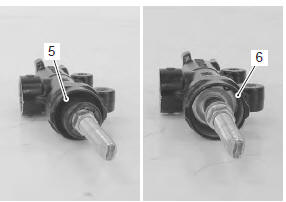
- Pull out the dust boot (5) and remove the snap ring (6).
Special tool
 : 09900–06108 (snap ring remover
(close
type))
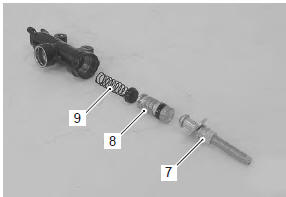
- Remove the push rod (7), piston/cup set (8) and spring (9).
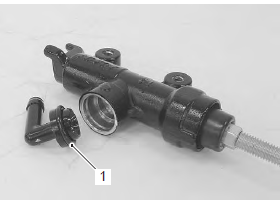
Assembly
Assemble the master cylinder in the reverse order of disassembly. Pay attention to the following points:
Caution
|
Bf: brake fluid (dot 4)
- Apply grease to the push rod end.
 : Grease 99000–25100 (suzuki
silicone
grease or equivalent)
| Caution replace the o-ring with a new one. |
 Rear brake master cylinder assembly removal and installation
Refer to “rear brake hose routing diagram” (page 4a-
2).
Removal
Remove the right side frame cover. Refer to “exterior parts removal and
installation” in section 9d .
Remove the rear ...
 Rear brake master cylinder parts inspection
Refer to “rear brake master cylinder disassembly and assembly” .
Master cylinder
Inspect the master cylinder bore for any scratches or
other damage.
Piston / rubber parts
Inspect the piston s ...
Other materials:
Clutch installation
Install the primary driven gear assembly (1).
Caution
if it is difficult to install the primary driven
gear, rotate the crankshaft.
Be sure to engage the oil pump drive
sprocket with the primary driven gear.
Install the spacer (2) and bea ...
Exterior parts construction
Upper cowling bracket
: set the punch mark to the front and upper side.
Rear view mirror cushion
: set the dent side to inside.
To frame
To headlight assembly
To sprocket cove
To side-stand bracket
...
Exhaust control valve inspection
Inspect exhaust control valve
initially at 1 000 km (600 miles, 2 months) and every
12 000 km (7 500 miles, 24 months) thereafter
Inspect exhaust control valve as follows:
remove the left side cowling. Refer to “exterior parts removal and
installation” in section 9d .
Check t ...