Suzuki GSX-R 1000 Service Manual: Speed sensor removal and installation
Removal
- Remove the left side cowling. Refer to “exterior parts removal and installation” in section 9d .
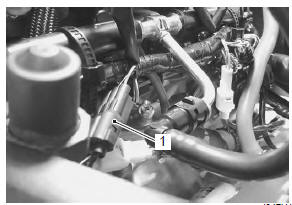
- Disconnect the speed sensor lead wire coupler (1).
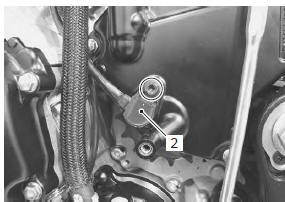
- Remove the speed sensor (2).
Installation
Install the speed sensor in the reverse order of removal.
Pay attention to the following points:
- tighten the speed sensor mounting bolt (1) to the specified torque.
Tightening torque speed sensor mounting bolt (a): 6.5 N·m (0.65 Kgf-m, 4.5 Lbf-ft)

- Route the speed sensor lead wire. Refer to “wiring harness routing diagram” in section 9a .
 Fuel level gauge inspection
Inspect the fuel level gauge in the following procedures:
remove the fuel pump. Refer to “fuel pump disassembly and assembly” in
section 1g .
Measure the resistance at each fuel l ...
 Speed sensor inspection
Inspect the speed sensor in the following procedures:
remove the speed sensor. Refer to “speed sensor removal and
installation” .
Connect a 12 v battery (between b and b/w), 10 k& ...
Other materials:
Front wheel related parts inspection
Refer to “front wheel assembly removal and installation” .
Tire
Refer to “tire inspection” in section 0b .
Front brake disc
Refer to “front brake disc inspection” in section 4b .
Dust seal
Inspect the lip of dust seals for wear or damage. If any
defects are found, replace the dust seal ...
Tire removal and installation
Removal
The most critical factor of a tubeless tire is the seal
between the wheel rim and the tire bead. For this
reason, it is recommended to use a tire changer that can
satisfy this sealing requirement and can make the
operation efficient as well as functional.
Removal the wheel ass ...
Specifications
Service data
Thermostat + radiator + fan + coolant
Tightening torque specifications
Note
the specified tightening torque is described in the following.
“Water hose routing diagram” “water pump components” “water
pump construction”
Reference: for the tig ...