Suzuki GSX-R 1000 Service Manual: Cooling system inspection
Inspect cooling system every 6 000 km (4 000 miles, 6 months)
Replace engine coolant every 2 years
Engine coolant level inspection
- Hold the motorcycle vertically.
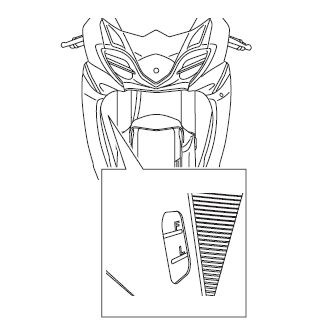
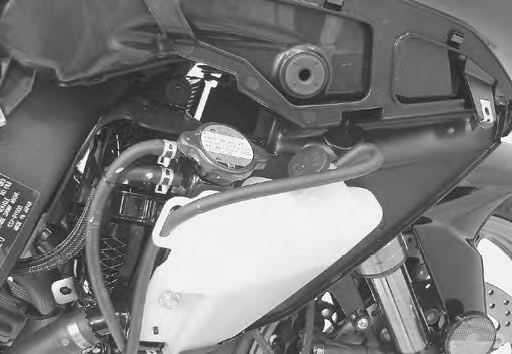
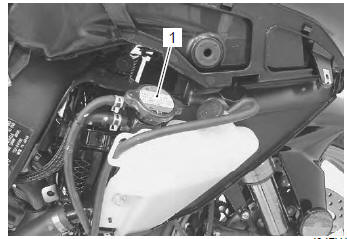
- Check the engine coolant level by observing the “f” and “l” lines on the engine coolant reservoir tank. If the level is below the “l” line, add engine coolant to the “f” line from the engine coolant reservoir tank filler (1) behind the right side cowling. Refer to “exterior parts removal and installation” in section 9d .
Engine coolant change
Refer to “engine coolant description” in section 1f .
 Do not open Do not open
the radiator cap when the engine is hot, as you may be injured by escaping hot liquid or vapor. Engine coolant may be harmful if swallowed or if it comes in contact with skin or eyes. If engine coolant gets into the eyes or in contact with the skin, flush thoroughly with plenty of water. If swallowed, induce vomiting and call physician immediately. |
- Remove the right side cowling. Refer to “exterior parts removal and installation” in section 9d .
- Remove the radiator cap (1).
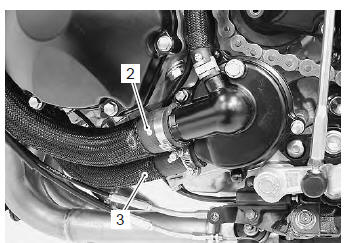
- Drain engine coolant by disconnecting the radiator outlet hose (2) and cylinder inlet hose (3).
- Flush the radiator with fresh water if necessary.
- Reconnect the hoses.
- Pour the specified engine coolant up to the radiator inlet.
Engine coolant capacity (excluding reservoir) 2 500 ml (2.6/2.2 Us/lmp qt)
- Bleed air from the cooling circuit.
- After changing engine coolant, reinstall the removed parts.
Air bleeding from the cooling circuit
- Remove the side cowlings. Refer to “exterior parts removal and installation” in section 9d (page 9d- 6).
- Add engine coolant up to the radiator inlet.
- Support the motorcycle upright.
- Slowly swing the motorcycle, right and left, to bleed the air trapped in the cooling circuit.
- Add engine coolant up to the radiator inlet.
- Start up the engine and bleed air from the radiator inlet completely.
- Repeat the procedures 5) to 6) until no air bleeds from the radiator inlet.
- Lift and support the fuel tank. Refer to “fuel tank removal and installation” in section 1g (page 1g- 9).
- Loosen the air bleeder bolt (1) and (2), then check the engine coolant flows out.

- Tighten the air bleeder bolt.
Tightening torque water pump air bleeder bolt: 13 n·m (1.3 Kgf-m, 4.5 Lbf-ft)
- Close the radiator cap securely.
- After warming up and cooling down the engine several times, add the engine coolant up to the full level of the reservoir.
 Caution Caution
|
- Reinstall the removed parts.
Radiator hose inspection
Check the radiator hoses for crack, damage or engine coolant leakage. Refer to “water hose inspection” in section 1f .
 Pair system inspection
Inspect pair system
every 12 000 km (7 500 miles, 24 months)
Inspect the pair (air supply) system periodically. Refer to “pair system
inspection” in section 1b .
Throttle valve synchronization
...
 Clutch cable play inspection and adjustment
Inspect clutch cable play
every 6 000 km (4 000 miles, 12 months)
Inspect and adjust the clutch cable play “a” as follows.
Clutch cable play “a”
10 – 15 mm (0.4 – 0.6 In)
Lift and support ...
Other materials:
Battery
Battery connection in reverse polarity is strictly
prohibited. Such a wrong connection will damage the
components of the fi system instantly when reverse
power is applied.
Removing any battery terminal of a running engine is
strictly prohibited. The moment such removal is made,
...
Regulator / rectifier removal and installation
Removal
Turn the ignition switch off.
Remove the right side cowling. Refer to “exterior parts removal and
installation” in section 9d .
Lift and support the fuel tank. Refer to “fuel tank
removal and installation” in section 1g (page 1g-
9).
Remove the evap system purge ...
Engine components removable with the
engine in place
Engine components which can be removed while the engine is installed on the
frame are as follows. For the installing
and removing procedures, refer to respective paragraphs describing each
component.
Center of engine
Item
Removal
Inspection
Installation
...