Suzuki GSX-R 1000 Service Manual: Diagnostic information and procedures
Engine lubrication symptom diagnosis
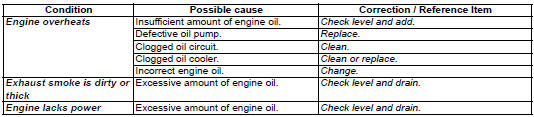
Oil pressure check
Check the engine oil pressure periodically. This will give a good indication of the condition of the moving parts.
| Note before checking the oil pressure, check the following.
|
- Start the engine and check if the oil pressure indicator light is turned on. If the light stays on, check the oil pressure indicator light circuit. If the circuit is ok, check the oil pressure in the following manner.
- Remove the left side cowling. Refer to “exterior parts removal and installation” in section 9d .
- Remove the oil pressure switch lead wire (1) and oil pressure switch (2).
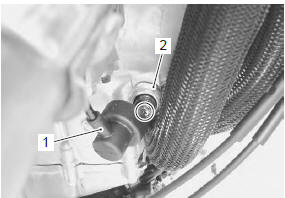
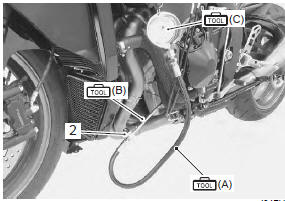
- Install the special tools to the mounting hole of the oil pressure switch.
Special tool (a): 09915–74521 (adapter hose) (b): 09915–17410 (oil pressure gauge adapter) (c): 09915–77331 (oil pressure gauge (1000 kpa))
- Install the oil pressure switch (2) to the adapter.
- Warm up the engine as follows: summer: 10 min. At 2 000 r/min winter: 20 min. At 2 000 r/min
- after warming up, increase the engine speed to 3
000 r/min (observe the tachometer), and read the oil
pressure gauge.
If the oil pressure is lower or higher than the specification, the following causes may be considered.
Oil pressure specification 100 – 400 kpa (1.0 – 4.0 Kgf/cm2, 14 – 57 psi) at 3 000 r/min, oil temp. 60 °C (140 °f)
|
High oil pressure |
Low oil pressure |
|
|
- Stop the engine and remove the oil pressure gauge and attachment.
- Reinstall the oil pressure switch. Refer to “oil pressure switch removal and installation” .
- Check the engine oil level. Refer to “engine oil and filter replacement” in section 0b .
- Install the left side cowling. Refer to “exterior parts removal and installation” in section 9d (page 9d- 6).
 Schematic and routing diagram
Engine lubrication system chart diagram
Engine lubrication circuit diagram
...
 Repair instructions
Engine oil and filter replacement
Refer to “engine oil and filter replacement” in section 0b .
Engine oil level inspection
Refer to “engine oil and filter replacement” in section 0b . ...
Other materials:
Clutch control system components
Push rod
Clutch release camshaft
Clutch release arm
Clutch cable
1 N·m (0.1 Kgf-m, 0.7
Lbf-ft)
6 N·m
(0.6 Kgf-m, 4.5 Lbf-ft)
10 N·m
(1.0 Kgf-m, 0.7 Lbf-ft)
Apply grease
Do not reuse.
...
License plate light bulb replacement
Caution
when you touch the bulb with your bare
hands, clean the bulb with a cloth moistened
with alcohol or soap water to prevent
premature bulb failure.
Remove the license plate light mounting nuts.
Remove the lens cover (1) by removing the screws.
Re ...
Oil jet inspection
Refer to “oil jet removal and installation” .
Oil jet
Make sure that the oil jets are not clogged. If they are
clogged, clean their oil passage using a wire of the
proper size and compressed air.
Piston cooling jet
Oil jet (for transmission)
Oil jet (for cam chain te ...