
Suzuki GSX-R 1000 Service Manual: DTC “c28” (p1655): secondary throttle valve actuator (stva) malfunction
Detected condition and possible cause
|
Detected condition |
Possible cause |
| The operation voltage does not reach the stva. Ecm does not receive communication signal from the stva. Stva can not operate properly or its motor locked |
|
Wiring diagram
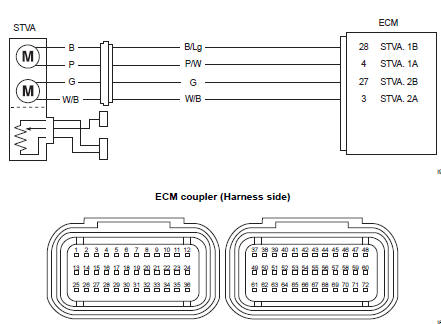
Troubleshooting
| Caution when using the multi-circuit tester, do not strongly touch the terminal of the ecm coupler with a needle pointed tester probe to prevent terminal damage. |
| Note after repairing the trouble, clear the dtc using sds tool. Refer to “use of sds diagnosis reset procedures” . |
|
Step |
Action |
Yes |
No |
|
1 |
Is the operation ok? |
Go to step 2. |
|
| 2 |
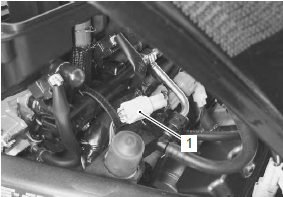
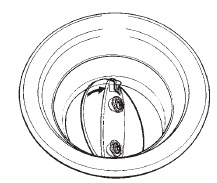
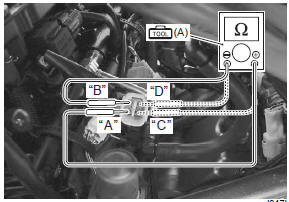
Special tool (a): 09900–25008 (multi circuit tester set) Tester knob indication resistance (Ω) Stva continuity ∞Ω¶ (infinity) (terminal . Ground)
Special tool
Stva resistance approx. 6.5 Ω (terminal “a” – terminal “b”, terminal “c” – terminal “d”)
|
|
|
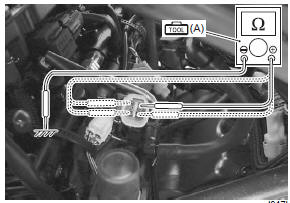
 (a): 09900–25008 (multi
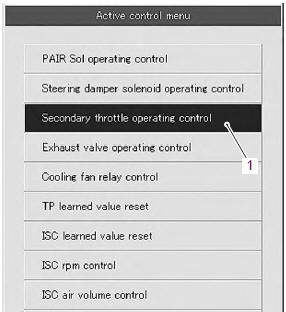
Active control inspection
- Set up the sds tool. (Refer to the sds operation manual for further details.)
- Turn the ignition switch on.
- Click “secondary throttle operating control” (1).
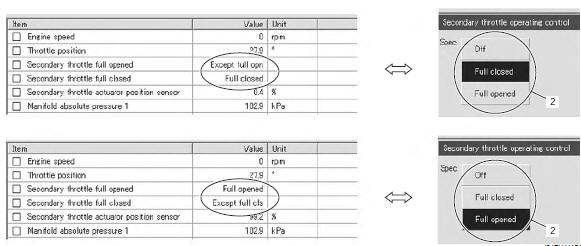
- Click each button (2).
At this time, if an operation sound is heard from the stva, the function is normal.
 DTC “c23” (p1651-h/l): to sensor circuit
malfunction
DTC “c23” (p1651-h/l): to sensor circuit
malfunction
Detected condition and possible cause
Detected condition
Possible cause
C23
The sensor voltage should be the
following for 2 sec. And more, after ignition
switch i ...
 DTC “c29” (p1654-h/l): secondary throttle
position sensor (stps) circuit malfunction
DTC “c29” (p1654-h/l): secondary throttle
position sensor (stps) circuit malfunction
Detected condition and possible cause
Detected condition
Possible cause
C29
Output voltage is not within the following
range.
Difference between actual throttle op ...
Other materials:
Tp sensor removal and installation
Refer to “throttle body disassembly and assembly” in section 1d .
Removal
Remove the throttle body. Refer to “throttle body
removal and installation” in section 1d (page 1d-
10).
Remove the tp sensor (1) with the special tool.
Special tool
: 09930–11950 (torx wrench (5 mm))
...
Headlight beam adjustment
Adjust the headlight beam, both horizontally and
vertically.
Note
to adjust the headlight beam, adjust the
beam horizontally first, then vertically.
It is not necessary to remove the
combination meter to turn the adjusters.
Horiz ...
Oil jet inspection
Refer to “oil jet removal and installation” .
Oil jet
Make sure that the oil jets are not clogged. If they are
clogged, clean their oil passage using a wire of the
proper size and compressed air.
Piston cooling jet
Oil jet (for transmission)
Oil jet (for cam chain te ...