Suzuki GSX-R 1000 Service Manual: Ecm removal and installation
Removal
- Remove the frame covers. Refer to “exterior parts removal and installation” in section 9d (page 9d- 6).
- Disconnect the battery (–) lead wire.
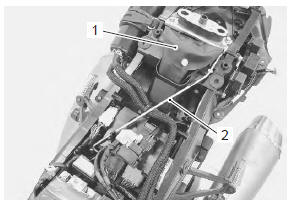
- Remove the tool set (1) and prop stay (2).
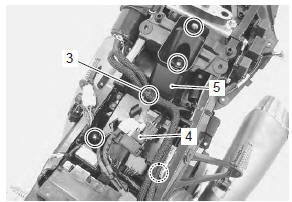
- Disconnect the hose clamp (3) (e-33 only) and starter relay (4).
- Remove the electric parts holder bracket (5).
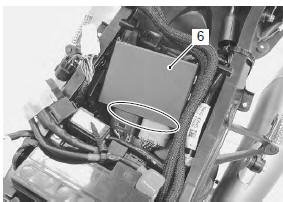
- Disconnect the couplers and remove the ecm (6).
Installation
Install the ecm in the reverse order of removal.
Cmp sensor inspection
Refer to “dtc “c11” (p0340): cmp sensor circuit malfunction” in section 1a .

 Cmp sensor removal and installation
Removal
Remove the air cleaner box. Refer to “air cleaner box removal and
installation” in section 1d .
Remove the pair control solenoid valve. Refer to “pair control solenoid
valve ...
Other materials:
Precautions
Precautions for driveline / axle
Refer to “general precautions” in section 00 (page 00-1).
Never inspect or
adjust the drive chain while the engine is running.
Caution
do not use trichloroethylene, gasoline or such similar
solvent. These fluids will d ...
Rear brake caliper parts inspection
Refer to “rear brake caliper disassembly and assembly” .
Brake caliper cylinder
Inspect the brake caliper cylinder wall for nicks,
scratches or other damage. If any damage is found,
replace the caliper with a new one.
Brake caliper piston
Inspect the brake caliper piston surface for any
s ...
DTC “c62” (p0443): evap system purge
control solenoid valve circuit malfunction
(e-33 only)
Detected condition and possible cause
Detected condition
Possible cause
Evap system purge control valve voltage is not input to
ecm.
Evap system purge control valve circuit open or short.
Evap system purge control valve malfunction.
Ecm malfunction. ...