Suzuki GSX-R 1000 Service Manual: Engine top side disassembly
It is unnecessary to remove the engine assembly from the frame when servicing the cylinder head cover and camshafts.
| Note before servicing the engine top side components (until camshafts removal) with the engine in place, remove the following parts:
Other parts except for these “engine top side components” can not be serviced with the engine installed in the frame. Refer to “engine assembly removal” and “engine assembly installation” . |
| Caution identify the position of each removed part. Organize the parts in their respective groups (e.G., Intake, exhaust) so that they can be reinstalled in their original positions. |
Cylinder head cover
- Remove the spark plugs. Refer to “ignition coil and spark plug removal and installation” in section 1h .
- Remove the cylinder head cover (1) and its gasket.
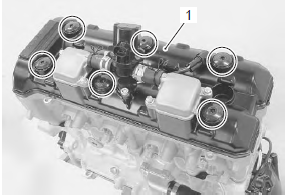
- Remove the dowel pins and o-rings.
Camshafts
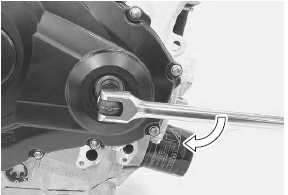
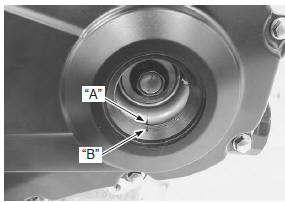
- Remove the valve timing inspection cap (1).
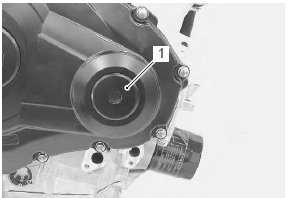
- Turn the crankshaft to bring the line “a” on the ckp sensor rotor to the slit “b” of cap hole thread and also to bring the camshafts to the position as shown.
- Remove the cam chain tension adjuster (2).
- Remove the gasket (3).
- Remove the cam chain guide no. 2 (4).
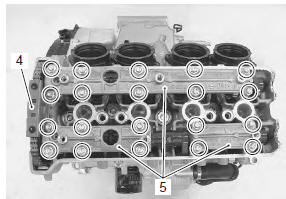
- Remove the camshaft journal holders (5).
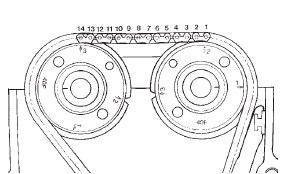
| Caution be sure to loosen the camshaft journal holder bolts evenly by shifting the wrench in the descending order of numbers. |
- Remove the dowel pins.
- Remove the intake camshaft (6) and exhaust camshaft (7).

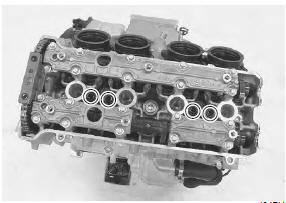
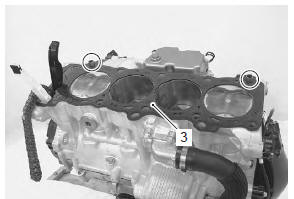
Cylinder head
| Note the cylinder head can not be serviced with the engine installed in the frame. |
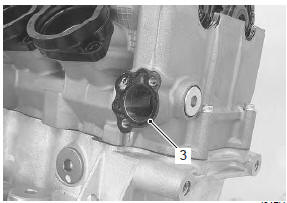
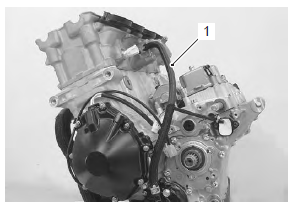
- Disconnect the water bypass hose (1).
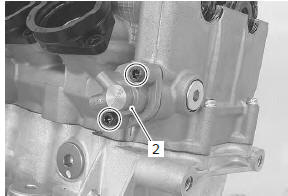
- Remove the cylinder head bolts (m6) (2).
- Remove the cylinder head bolts (m10) and washers.
| Note when loosening the cylinder head bolts, loosen each bolt little by little diagonally. |
- Remove the cylinder head.
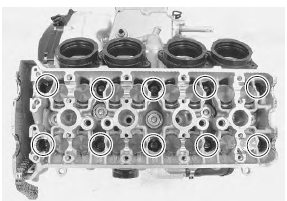
- Remove the dowel pins and cylinder head gasket (3).
 Engine assembly installation
Install the engine in the reverse order of engine removal.
Pay attention to the following points:
before installing the engine, install the collars (1).
Before installing the en ...
 Engine top side assembly
Assemble the engine top side in the reverse order of
disassembly. Pay attention to the following points:
Cylinder head
Install the dowel pins and a new cylinder head gasket
(1) to the cylinder ...
Other materials:
Rear view mirror construction
Body cowling
Cowling brace
Cushion
Turn signal lead wire
Turn signal lead
wire coupler
: locate the turn signal lead wire coupler (5) between the
mirror cover (6) and mirror body (7).
Mirror cover
Mirror body
10 N·m (1.0 Kgf-m, 7.0 L ...
Fuel pressure inspection
Keep away from fire or spark.
Spilled gasoline should be wiped off
immediately.
Work in a well-ventilated area.
Inspect the fuel pressure in the following procedures:
lift and support the fuel tank. Refer to “fuel tank removal and
installati ...
Starter torque limiter inspection
Removal
Remove the clutch cover. Refer to “clutch removal” in section 5c .
Remove the washers (1), starter idle gear no. 1 (2)
And no. 2 (3).
Remove the starter idle gear no. 2 Bearing (4), shaft
(5) and washer (6).
Hold the starter clutch with the special tool an ...