Suzuki GSX-R 1000 Service Manual: Fastener removal and installation
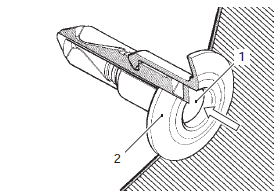
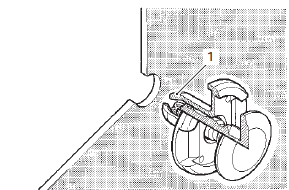
Type a
Removal
- Depress the head of fastener center piece (1).
- Pull out the fastener (2).
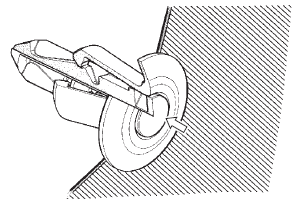
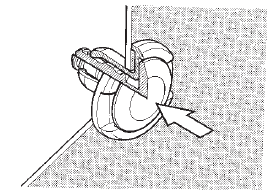
Installation
- Let the center piece stick out toward the head so that the pawls “a” closes.
- Insert the fastener into the installation hole.
| Note to prevent the pawl “a” from damage, insert the fastener all the way into the installation hole. |
- Push in the head of center piece until it becomes flush with the fastener outside face.
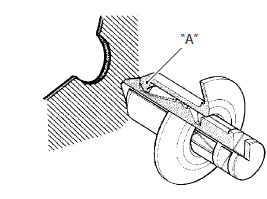
Type b
Removal
- Pry up the head of fastener center piece (1) with a screw driver.
- Pull out the fastener “a”.
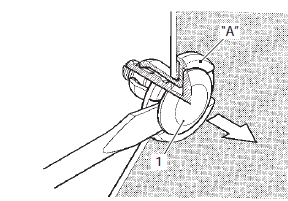
Installation
- Insert the fastener into the installation hole.
| Note to prevent the pawl (1) from damage, insert the fastener all the way into the installation hole. |
- Push in the head of center piece.
 Rear view mirror construction
Body cowling
Cowling brace
Cushion
Turn signal lead wire
Turn signal lead
wire coupler
: locate the turn signal lead wire coupler (5) between the
mirro ...
 Exterior parts removal and installation
Side frame cover
Removal
Note
the left and right side frame covers are
installed symmetrically and therefore the
removal/installation procedure for one side is
the same as that fo ...
Other materials:
Cushion lever removal and installation
Removal
Remove the right side cowling and side frame covers. Refer to “exterior
parts removal and installation” in section 9d .
Support the motorcycle with a jack to relieve load on
the cushion levers.
Remove the left muffler and muffler chamber heat guard no. 2. Refer to
...
Starter motor components
O-ring
Housing end (inside)
O-ring
Starter motor case
Armature
Housing end (outside)
10
N·m (1.0 Kgf-m, 7.0 Lbf-ft)
4 N·m (0.4
Kgf-m, 3.0 Lbf-ft)
5 N·m (0.5
Kgf-m, 3.5 Lbf-ft)
Apply grease to sliding
surface
Apply moly ...
Starter clutch inspection
Refer to “starter clutch removal and installation” .
Starter clutch
Install the starter driven gear onto the starter clutch.
Turn the starter driven gear by hand to inspect the
starter clutch for a smooth movement. The gear
turns in one direction only. If a large resistance is felt
...