Suzuki GSX-R 1000 Service Manual: Front wheel dust seal / bearing removal and installation
Removal
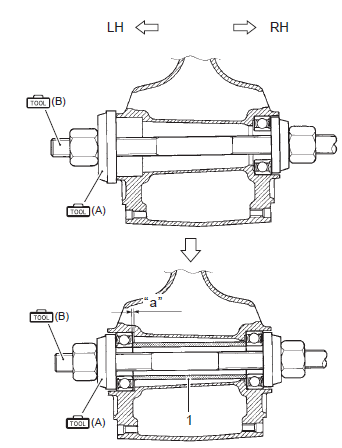
- Remove the front wheel assembly. Refer to “front wheel assembly removal and installation” .
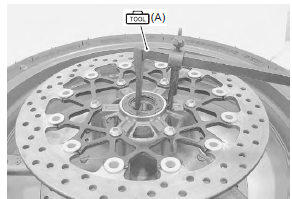
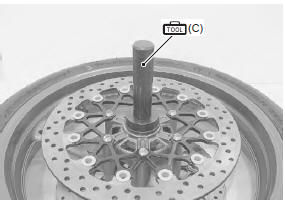
- Remove the dust seals using the special tool.
Special tool
 (a): 09913–50121 (oil
seal remover)
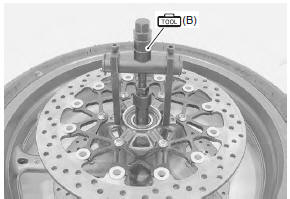
- Remove the wheel bearings using the special tool.
Special tool
 (b): 09921–20240 (bearing remover
set)
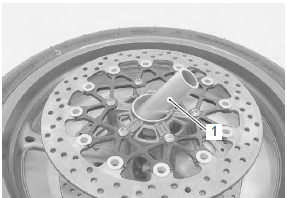
- Remove the spacer (1).
Installation
| Caution the removed dust seals and bearings must be replaced with new ones. |
- Apply grease to the wheel bearings.
 : Grease 99000–25010 (suzuki
super
grease “a” or equivalent)

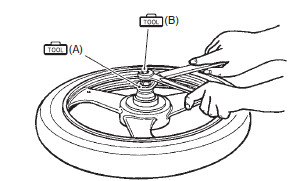
- First install the right wheel bearing, then install the spacer (1) and left wheel bearing with the special tool.
Special tool
(a):
09924–84510 (bearing installer set)
(b):
09941–34513 (bearing installer)
| Caution the sealed cover of the bearing must face outside. |
|
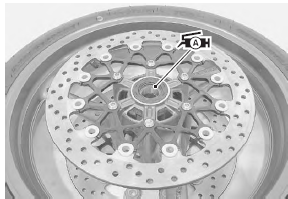
- Install the dust seals with the special tool.
Special tool
(c):
09913–70210 (bearing installing set (10
– 75 Ô))
- Apply grease to the lip of dust seals.
 : Grease 99000–25010 (suzuki
super
grease “a” or equivalent)
- Install the front wheel assembly. Refer to“front wheel assembly removal and installation” .
 Front wheel related parts inspection
Refer to “front wheel assembly removal and installation” .
Tire
Refer to “tire inspection” in section 0b .
Front brake disc
Refer to “front brake disc inspection” in section 4b .
Dust seal
...
 Rear wheel components
Rear axel nut
Collar
Dust seal
Bearing
Retainer
Rear sprocket
Sprocket mounting drum
Wheel damper
Bearing
Spacer
Air valve
Rear wheel
...
Other materials:
DTC “c93” (p1769): steering damper
solenoid valve circuit malfunction
Detected condition and possible cause
Detected condition
Possible cause
C93
Steering damper control current does not flow to
the solenoid valve. With ig turned on, ecm
detects a failure of internal circuit element.
Solenoid current does not converge to the ...
Side-stand construction
Frame
Side-stand bracket
Washer
Side-stand
50 N·m (5.0 Kgf-m,
36.0 Lbf-ft)
40 N·m
(4.0 Kgf-m, 29.0 Lbf-ft)
Apply grease to sliding
surface.
...
To sensor removal and installation
Removal
Remove the ap sensor. Refer to “ap sensor removal and installation” .
Disconnect the coupler (1) and remove the to
sensor (2).
Installation
Install the to sensor in the reverse order of removal.
Pay attention to the following point:
when installing the to s ...