Suzuki GSX-R 1000 Owners Manual: Lower light bulb

- Turn the socket 1 counterclockwise and remove it.
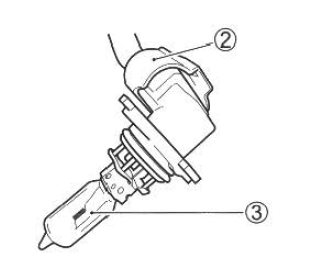
- Turn the socket 2 counterclockwise and remove it.
- Remove the bulb 3 from the socket.
|
Caution Oil from your skin may damage the headlight bulb or shorten its life. Grasp the new bulb with a clean cloth. |
 Headlight
To replace the headlight bulbs,
perform the following steps:
Upper light bulb
Remove the bolt 1 to lift the
instrument panel 2.
Turn the cap 3 counterclockwise
and remove it.
...
 Turn signal light
To replace the turn signal light
bulb, follow these directions.
Remove screw and take off
the lens.
Turn the socket counterclockwise
and remove it.
Push in the bulb an ...
Other materials:
Evaporative emission control system
inspection (only for e-33)
Refer to “evaporative emission control system removal and installation (only
for e-33)” .
Hose
Inspect the hoses for wear or damage. If it is worn or
damage, replace the hose with a new one.
Note
make sure that the hoses are securely
connected.
Evap canister
Inspect the eva ...
Rear lighting system construction
License plate light assembly
Reflex reflector (e-03, 28, 33 only)
Clamp
: clamp the license plate light lead wire
so as not to be slack.
Rear combination light
Rear turn signal light assembly (lh/rh)
5
N·m (0.5 Kgf-m, 3.5 Lbf-ft)
1.8 N·m
...
Rear brake hose removal and installation
Removal
Drain brake fluid. Refer to “brake fluid replacement” .
Remove the rear brake hoses as shown in the rear brake hose routing
diagram. Refer to “rear brake hose routing diagram” .
Installation
Caution
the seal washers should be replaced with
new ones to prevent ...