Suzuki GSX-R 1000 Service Manual: Oil cooler / oil cooler hose inspection and cleaning
Refer to “exterior parts removal and installation” in section 9d .
Oil cooler hose inspection
Inspect the oil cooler hoses for any damage and oil leakage. If any defects are found, replace the oil cooler hose with a new one.
Oil cooler inspection
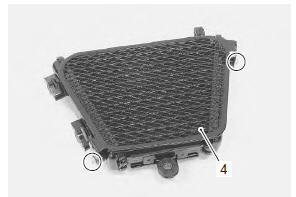
- Remove the oil cooler guard (1).
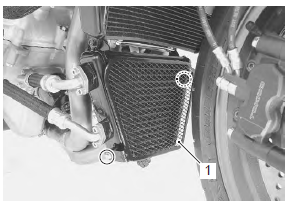
- Inspect the oil cooler for oil leakage. If any defects are found, replace the oil cooler with a new one. If the fins are bent or dented, repair them by carefully straightening them with the blade of a small screwdriver.
- Reinstall the removed parts.
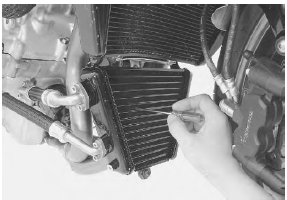
Oil cooler cleaning
- Remove the oil cooler guard (1).
- Remove the oil cooler mounting bolts.
- Blow out any foreign matter that is stuck in the oil cooler fins using compressed air.
Caution
|
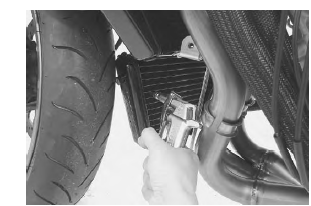
- Reinstall the removed parts.
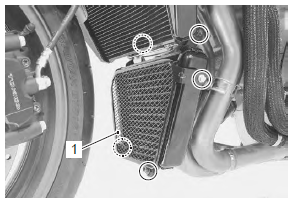
- Remove the oil cooler guard (4).
Installation
Install the oil cooler and oil cooler hoses in the reverse order of removal. Pay attention to the following points:
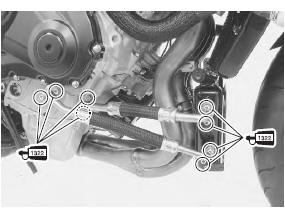
- apply thread lock to the oil cooler mounting bolt and tighten them securely.
 : Thread lock cement
99000–32110
(thread lock cement super “1322” or
equivalent)

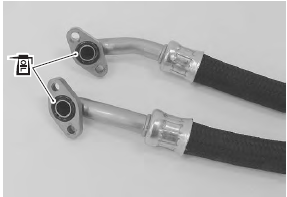
- Apply engine oil to new o-rings.
| Caution replace the o-rings with new ones to prevent oil leakage. |
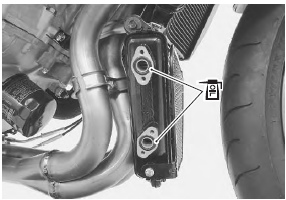
- Apply thread lock to the oil cooler hose bolts and tighten them securely
 : Thread lock cement
99000–32110
(thread lock cement super “1322” or
equivalent)
- Pour engine oil. Refer to “engine oil and filter replacement” in section 0b .
- Install the removed parts.
 Oil pressure regulator / oil strainer
inspection
Oil pressure regulator / oil strainer
inspection
Refer to “oil pan / oil pressure regulator / oil strainer removal and
installation” .
Oil pressure regulator
Inspect the operation of the oil pressure regulator by
pushing the piston with a prope ...
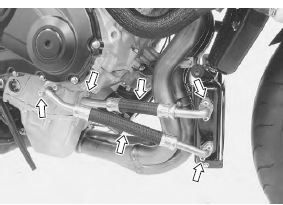
 Oil cooler / oil cooler hose removal and
installation
Oil cooler / oil cooler hose removal and
installation
Refer to “electrical components location” in section 0a .
Removal
Turn the ignition switch off.
Remove the left side cowling. Refer to “exterior parts removal and
installation” in sect ...
Other materials:
Special tools and equipment
Recommended service material
Note
required service material is also described in the following.
“Water hose routing diagram” “water pump components” “water
pump construction”
Special tool
...
Drive mode selector inspection
Inspect the drive mode selector in the following procedures:
set up the sds tool. (Refer to the sds operation manual for
further details.)
Turn the ignition switch on.
Click “data monitor”.
Make sure each of “driving mode selection” on the monitor is
indicated ...
Front brake master cylinder parts inspection
Refer to “front brake master cylinder / brake lever disassembly and assembly”
.
Master cylinder
Inspect the master cylinder bore for any scratches or
other damage
Piston / rubber parts
Inspect the piston surface for any scratches or other
damage.
Inspect the primary cup, secondary cup ...