Suzuki GSX-R 1000 Service Manual: Oil pump removal and installation
| Note be careful not to drop any parts into the crankcase. |
Removal
- Remove the oil pan, oil pressure regulator and oil strainer. Refer to “oil pan / oil pressure regulator / oil strainer removal and installation” .
- Remove the oil pump driven gear bolt (1).
- Remove the oil pump driven sprocket (2).
- Remove the washer (3).
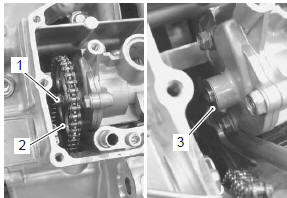
- Remove the oil pump (4).
- Remove the o-ring (5) and dowel pins.
Installation
- Install the dowel pins.
- Apply grease to new o-ring.
| Caution use a new o-ring to prevent oil leakage. |
 : Grease 99000–25010 (suzuki
super
grease “a” or equivalent)
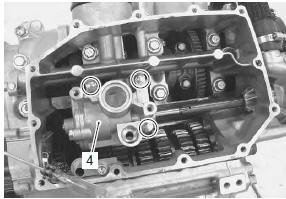
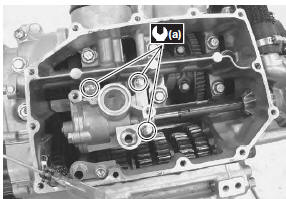
- Install the oil pump.
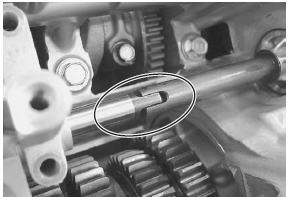
| Note engage the oil pump shaft end with the water pump shaft slot. |
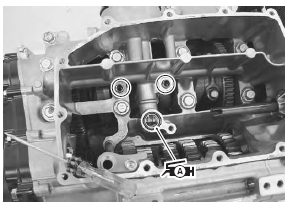
- Tighten the oil pump mounting bolts to the specified torque.
Tightening torque oil pump mounting bolt (a): 10 n·m (1.0 Kgf-m, 7.0 Lbf-ft)
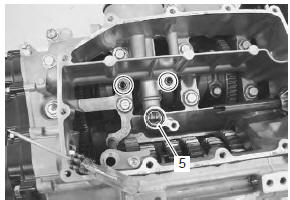
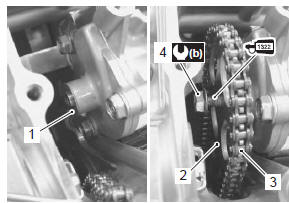
- Install the washer (1).
- Install the oil pump driven sprocket (2) with the chain (3).
- Apply a small quantity of thread lock to the oil pump driven sprocket bolt (4) and tighten it to the specified torque.
 : Thread lock cement
99000–32110
(thread lock cement super “1322” or
equivalent)
Tightening torque oil pump driven sprocket bolt (b): 10 n·m (1.0 Kgf-m, 7.0 Lbf-ft)
- Install the oil pan, oil strainer and oil pressure regulator. Refer to “oil pan / oil pressure regulator / oil strainer removal and installation” .
 Oil jet inspection
Refer to “oil jet removal and installation” .
Oil jet
Make sure that the oil jets are not clogged. If they are
clogged, clean their oil passage using a wire of the
proper size and compressed air.
...
 Oil pump inspection
Inspect the oil pump in the following procedures:
remove the oil pump. Refer to “oil pump removal and installation” .
Rotate the oil pump by hand and check that it moves
smoothly. ...
Other materials:
Wiring diagram
Refer to “wire color symbols” in section 0a .
For e-02, 19, 24, 51
For e-03, 28
For e-14, 33
...
Engine top side assembly
Assemble the engine top side in the reverse order of
disassembly. Pay attention to the following points:
Cylinder head
Install the dowel pins and a new cylinder head gasket
(1) to the cylinder.
Caution
use a new gasket to prevent gas leakage.
Place the cylinder head ...
Battery visual inspection
Inspect the battery in the following procedures:
remove the front seat. Refer to “exterior parts
removal and installation” in section 9d (page 9d-
6).
Visually inspect the surface of the battery container.
If any signs of cracking or electrolyte leakage from
the sides of th ...