Suzuki GSX-R 1000 Service Manual: Rear wheel dust seal / bearing removal and installation
Removal
- Remove the rear wheel assembly. Refer to “rear wheel assembly removal and installation” .
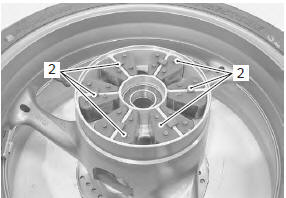
- Remove the rear sprocket mounting drum assembly (1) from the rear wheel.
- Remove the wheel dampers (2).
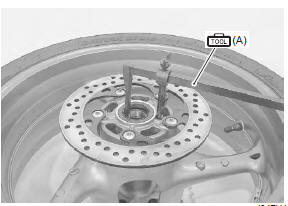
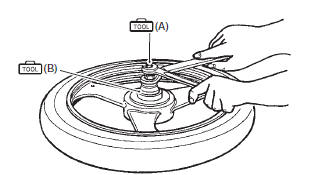
- Remove the dust seal.
Special tool
 (a): 09913–50121 (oil seal
remover)
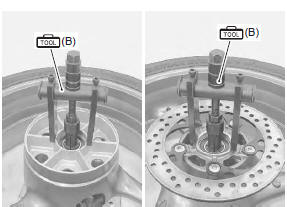
- Remove the bearings on both sides using the special tool.
Special tool
 (b): 09921–20240 (bearing remover
set)
- Remove the spacer (3).
Installation
| Caution the removed dust seal and bearings must be replaced with new ones. |
- Apply grease to the wheel bearings.
 : Grease 99000–25010 (suzuki
super
grease “a” or equivalent)
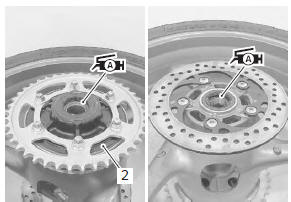
- First install the right wheel bearing, then install the spacer (1) and left wheel bearing with the special tools.
Special tool
 (a): 09941–34513 (bearing
installer)
 (b): 09924–84510 (bearing
installer set)
| Caution the sealed cover of the bearing must face outside. |
|
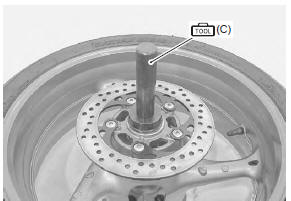
- Install new dust seal with the special tool.
Special tool
 (c): 09913–70210 (bearing
installing set (10
– 75 Ô))
- Install the rear sprocket mounting drum assembly (2).
- Apply grease to the lip of dust seals.
 : Grease 99000–25010 (suzuki
super
grease “a” or equivalent)
- Install the rear wheel assembly. Refer to “rear wheel assembly removal and installation” .
 Rear wheel related parts inspection
Refer to “rear wheel assembly removal and installation” .
Tire
Refer to “tire inspection” in section 0b .
Rear brake disc
Refer to “rear brake disc inspection” in section 4c .
Wheel damper
...
 Tire removal and installation
Removal
The most critical factor of a tubeless tire is the seal
between the wheel rim and the tire bead. For this
reason, it is recommended to use a tire changer that can
satisfy this sealing requ ...
Other materials:
Rear brake components
Rear brake caliper
Piston seal
Dust seal
Piston
Rear caliper bracket
Rear brake pad set
Rear brake disc
Brake pad spring
6
N·m (0.6 Kgf-m, 4.5 Lbf-ft)
27 N·m
(2.7 Kgf-m, 19.5 Lbf-ft)
12 N·m
(1.2 Kgf-m, 8.5 Lbf-ft)
17 N·m ...
Horn inspection
Note
if the horn sound condition is normal, it is not
necessary to inspect the horn button
continuity.
Horn button inspection
Remove the air cleaner box. Refer to “air cleaner box removal and
installation” in section 1d .
Disconnect the left handlebar switch lead ...
Specifications
Service data
Wattage
unit: w
Tightening torque specifications
Note
the specified tightening torque is described in the following.
“Rear lighting system construction” “license plate light
components” “reflex reflector construction”
Reference: for the ...