Suzuki GSX-R 1000 Service Manual: Fuel pump disassembly and assembly
Disassembly
- Remove the fuel tank. Refer to “fuel tank removal and installation” .
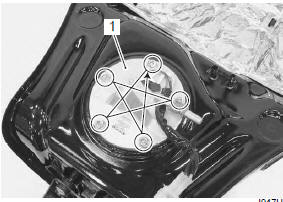
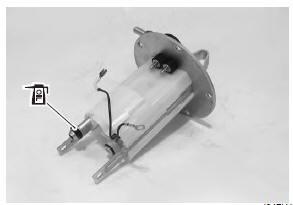
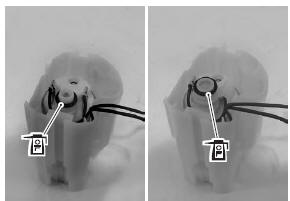
- Remove the fuel pump assembly (1) by removing its mounting bolts diagonally.
|
|

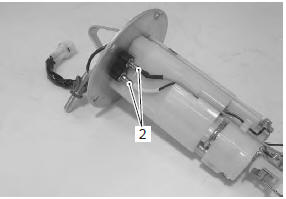
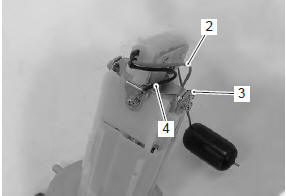
- Disconnect the lead wires (2).
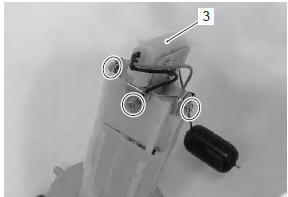
- Remove the fuel level gauge (3).
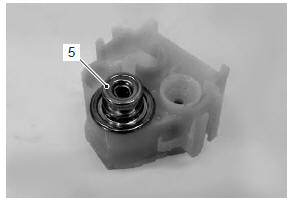
- Remove the fuel pressure regulator assembly (4).
| Caution never remove the fuel pressure regulator (5) from the holder. |
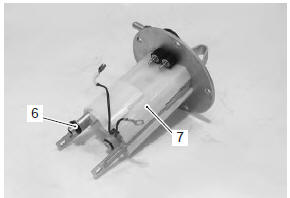
- Remove the o-ring (6) and fuel pump case (7).
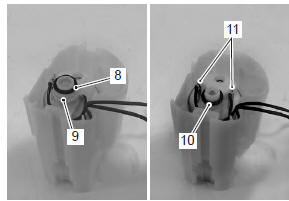
- Remove the o-ring (8) and joint (9).
- Remove the o-ring (10) and lead wires (11).
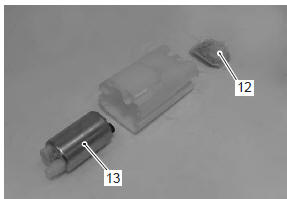
- Remove the fuel mesh filter (12).
- Remove the fuel pump (13).
Assembly
Refer to “fuel mesh filter inspection and cleaning” .
Assemble the fuel tank pump in the reverse order of the disassembly. Pay attention to the following points:
Caution
|
| Caution connect all lead wires securely so as not to cause contact failure. |

|
- Install a new o-ring and apply grease to it.
 : Grease 99000–25010 (suzuki
super
grease “a” or equivalent)
 The o-ring The o-ring
must be replaced with a new one to prevent fuel leakage. |
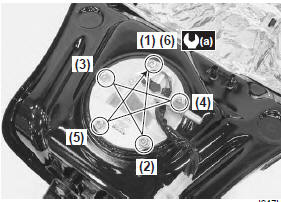
- When installing the fuel pump assembly, first tighten all the fuel pump mounting bolts lightly and then to the specified torque in the ascending of numbers.
Tightening torque fuel pump mounting bolt (a): 10 n·m (1.0 Kgf-m, 7.0 Lbf-ft)
 Fuel pump components
Fuel level gauge
Fuel pressure regulator assembly
O-ring
Joint
Fuel pump
Fuel pump case
Fuel mesh filter
10
N·m (1.0 Kgf-m, 7.0 Lbf-ft)
Appl ...
 Fuel mesh filter inspection and cleaning
Inspect the fuel mesh filter in the following procedures:
remove the fuel mesh filter. Refer to “fuel pump disassembly and
assembly” .
If the fuel mesh filter is clogged with fore ...
Other materials:
Throttle cable routing diagram
Throttle cable no. 1
Throttle cable no. 2
Clutch cablev
Front brake hose
Pass
the throttle cables in front of the front brake hose.
Pass the
clutch cable above the right air intake pipe.
Clamp the
clutch cable at the white taping point and m ...
Show data when trouble (displaying data at
the time of DTC)
Use of sds
Ecm stores the engine and driving conditions (in the form of data as shown in
the figure) at the moment of the
detection of a malfunction in its memory. This data is called “show data when
trouble”.
Therefore, it is possible to know engine and driving conditions (e.G., Whether
...
Battery current leakage inspection
Inspect the battery current leakage in the following
procedures:
turn the ignition switch off.
Remove the front seat. Refer to “exterior parts
removal and installation” in section 9d (page 9d-
6).
Disconnect the battery (–) lead wire.
Measure the current betwee ...