Suzuki GSX-R 1000 Service Manual: Air cleaner element removal and installation
Removal
- Lift and support the fuel tank. Refer to “fuel tank removal and installation” in section 1g (page 1g- 9).
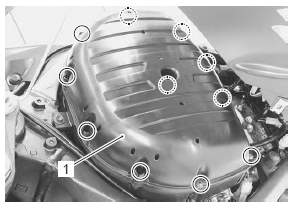
- Remove the air cleaner box cover (1).
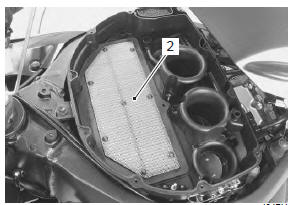
- Remove the air cleaner element (2).
Installation
Installation is in the reverse order of removal.
 Engine components removable with the
engine in place
Engine components removable with the
engine in place
Engine components which can be removed while the engine is installed on the
frame are as follows. For the installing
and removing procedures, refer to respective paragraphs describing each
compon ...
 Air cleaner box removal and installation
Removal
Lift and support the fuel tank. Refer to “fuel tank
removal and installation” in section 1g (page 1g-
9).
Remove the air cleaner box cover. Refer to “air cleaner element remova ...
Other materials:
Fuses
The main fuse is located under
the front seat. To access the fuse,
remove the seat by referring to
the seat lock and helmet
holders.
The fuses are located inside the
left fairing. One 1 oa and one 15a
spare fuses are provided inside
the fuse box.
They are designed to open when ...
DTC “c41” (p2505): ecm power input signal
malfunction
Detected condition and possible cause
Detected condition
Possible cause
C41/P2505
No voltage is applied to the ecm.
Lead wire/coupler connection of ecm terminal to fuel
fuse.
Fuel fuse.
Wiring diagram
Troubleshooting
C ...
Schematic and routing diagram
Engine lubrication system chart diagram
Engine lubrication circuit diagram
...