Suzuki GSX-R 1000 Service Manual: Front brake caliper disassembly and assembly
Refer to “front brake caliper removal and installation” .
| Note the right and left calipers are installed symmetrically and therefore the disassembly procedure for one side is the same as that for the other side. |
Disassembly
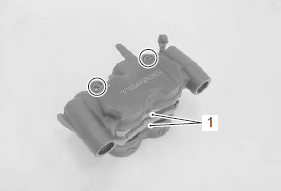
- Remove the brake pads (1) and spring from the caliper by removing the pad mounting pins.
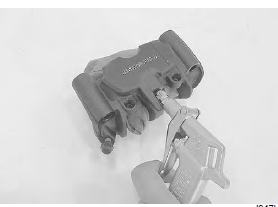
- Place a rag over the pistons to prevent them from popping out and then force out the pistons using compressed air.
| Caution do not use high pressure air to prevent piston damage. |
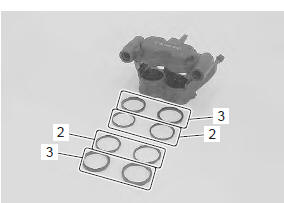
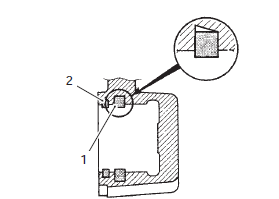
- Remove the dust seals (2) and piston seals (3) from both sides of the caliper.
Assembly
Assemble the caliper in the reverse order of disassembly. Pay attention to the following points:
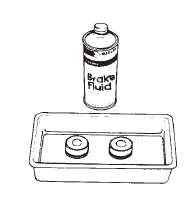
- wash the caliper bores and pistons with specified brake fluid. Particularly wash the dust seal grooves and piston seal grooves.
Bf: brake fluid (dot 4)
Caution
|
- Apply the brake fluid to piston seals (1) and dust seals (2).
| Caution replace the piston seals (1) and dust seals (2) with new ones. |
Bf: brake fluid (dot 4)
- Install the piston seals as shown in the figure.Install the piston seals as shown in the figure.
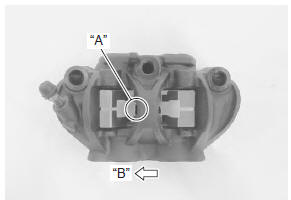
- When installing the spring to the caliper, bring its wider pawl “a” facing top side.
|
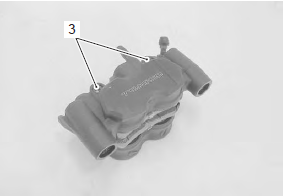
- Install the brake pads and temporarily tighten the pad mounting pins (3).
 Front brake caliper removal and installation
Note
the right and left calipers are installed
symmetrically and therefore the removal
procedure for one side is the same as that for
the other side.
Removal
Drain brake f ...
 Front brake caliper parts inspection
Refer to “front brake caliper disassembly and assembly” .
Brake caliper cylinder
Inspect the brake caliper cylinder wall for nicks,
scratches or other damage. If any damage is found,
replace the c ...
Other materials:
Rear brake pedal removal and installation
Removal
Remove the master cylinder assembly. Refer to “rear brake master
cylinder assembly removal and installation” .
Disconnect the rear brake light switch lead wire coupler. Refer to
“rear brake light switch inspection” .
Remove the rear brake pedal as shown in the rear ...
Engine oil and filter change
Change the engine oil and oil filter
at the scheduled times. The
engine should always be warm
when the oil is changed so the oil
will drain easily. The procedure is
as follows:
Place the motorcycle on the
side stand.
Remove the three screws of
the right fairing 1.
...
Clutch removal
Drain engine oil. Refer to “engine oil and filter replacement” in
section 0b .
Lift and support the fuel tank with the prop stay.
Refer to “fuel tank removal and installation” in section 1g .
Disconnect the ckp sensor coupler (1).
Remove the clutch cover (2).
...