Suzuki GSX-R 1000 Owners Manual: Front wheel removal
- Place the motorcycle on the side stand.
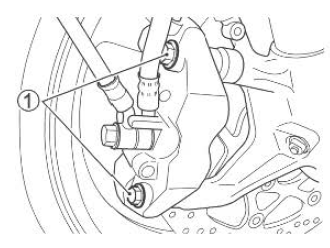
- Remove both brake calipers from the front forks by removing two mounting bolts 1 on each calipers.
Note
: never squeeze the front brake lever with the caliper removed. It is very difficult to force the pads back into the caliper assembly and brake fluid leakage may result.
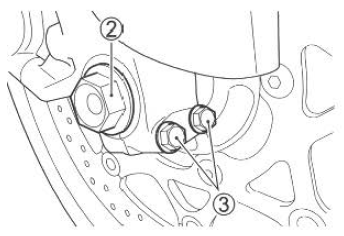
- Remove the bolts 2.
- Loosen the axle holder bolts 3.
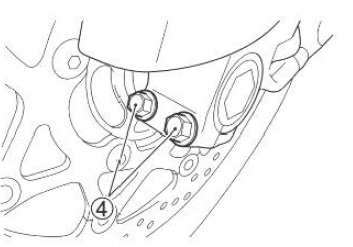
- Loosen the axle holder bolts 4.
- Place an accessory service stand or equivalent under the swing arm to help stabilize the rear end.
- Carefully position a jack under the exhaust pipe and raise until the front wheel is slightly off the ground.
|
Caution Improper jacking may cause damage to the fairing or oil filter. Do not apply the jack head to the fairing lower part or the oil filter when jacking up the motorcycle. |
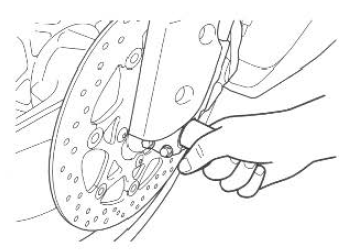
- Draw out the axle shaft.
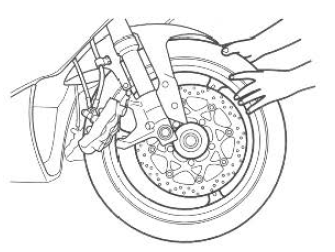
- Slide the front wheel forward.
- To reinstall the wheel assembly, reverse the sequence as described.
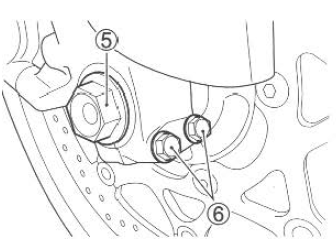
- Hold the shaft and tighten the bolt 5 to the specified torque.
- Tighten the axle holder bolts 6 to the specified torque.
- Move the steering up and down several times.
- Tighten the axle holder bolts 7 To the specified torque.
- After installing the wheel, apply the brake several times to restore the proper lever stroke.
 Warning Warning
Before riding, "pump" the brake repeatedly until brake pads are pressed against the brake disks and proper lever/ pedal stroke and firm feel are restored. Also check that the wheel rotates freely. |
| Warning
The tire for this motorcycle is directional. Therefore, the motorcycle may have unusual handling if the wheel is installed incorrectly. Install the front wheel in a specified direction, as indicated by the arrow on the sidewall of the tire. |
| Warning
Torque bolts and nuts to the proper specifications. If you are not sure of the proper procedure, have your authorized suzuki dealer or qualified mechanic do this. |
Front axle tightening torque: 100 n·m (1 0.0 Kgf-m, 72.5 Lb-ft)
Front axle holder bolt tightening torque: 23 n·m (2.3 Kgf-m, 16.5 Lb-ft)
Front brake caliper mounting bolt tightening torque: 39 n·m (3.9 Kgf-m, 28.0 Lb-ft)
 Side standngnition interlock switch
Check the side stand/ignition
interlock system for proper operation
as follows:
Sit on the motorcycle in the
normal riding position, with the
side stand up.
Shift into firs ...
 Rear wheel removal
Place the motorcycle on the
side stand.
Remove the cotter pin 1.
Remove the axle nut 2.
Warning
A hot muffler can burn you.
The muffler will be hot enough
to ...
Other materials:
Air cleaner box removal and installation
Removal
Lift and support the fuel tank. Refer to “fuel tank
removal and installation” in section 1g (page 1g-
9).
Remove the air cleaner box cover. Refer to “air cleaner element removal
and installation” .
Remove the air cleaner mounting bolt.
Remove the air clea ...
Front seat
To remove the front seat.
Remove the bolts 1 (right and
left).
Raise the front end of the seat
and slide it forward.
To reinstall the seat, slide the seat
hooks into the seat hook retainers
on the frame and tighten the bolts
securely.
Warning
Failure to insta ...
Air cleaner element removal and installation
Removal
Lift and support the fuel tank. Refer to “fuel tank
removal and installation” in section 1g (page 1g-
9).
Remove the air cleaner box cover (1).
Remove the air cleaner element (2).
Installation
Installation is in the reverse order of removal. ...