Suzuki GSX-R 1000 Service Manual: Rear shock absorber removal and installation
Removal
- Remove the right side cowling and side frame covers. Refer to “exterior parts removal and installation” in section 9d .
- Support the motorcycle with a jack to relieve load on the rear shock absorber.
- Remove the left muffler and muffler chamber heat guard no. 2. Refer to “muffler / muffler chamber / exhaust pipe removal and installation” in section 1k .
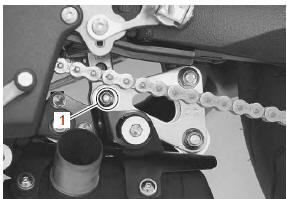
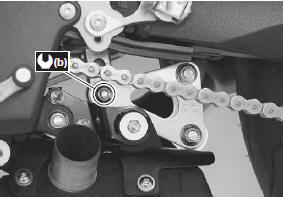
- Remove the rear shock absorber lower mounting bolt and nut (1).
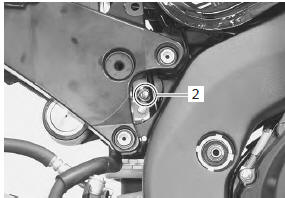
- Remove the rear shock absorber upper mounting bolt and nut (2).
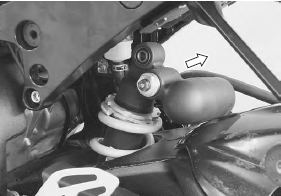
- Remove the rear shock absorber upward
Installation
Install the rear shock absorber in the reverse order of removal. Pay attention to the following points:
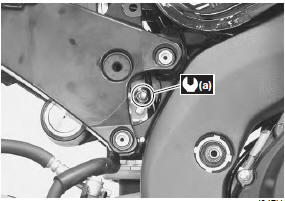
- tighten the rear shock absorber upper/lower mounting bolts and nuts.
Tightening torque rear shock absorber upper mounting nut (a): 50 n·m (5.0 Kgf-m, 36.0 Lbf-ft) rear shock absorber lower mounting nut (b): 50 n·m (5.0 Kgf-m, 36.0 Lbf-ft)
- Install the left muffler and muffler chamber heat guard no. 2. Refer to “muffler / muffler chamber / exhaust pipe removal and installation” in section 1k .
- Install the side frame covers and right side cowling.
Refer to “exterior parts removal and installation” in section 9d .
Rear suspension inspection
Refer to “rear suspension inspection” in section 0b .
 Rear suspension assembly construction
Rear shock absorber mounting bolt (upper)
Rear shock absorber mounting nut (lower)
Cushion rod mounting nut (front)
Cushion rod mounting nut (rear)
Cushion lever mo ...
 Rear shock absorber inspection
Refer to “rear shock absorber removal and installation” .
Shock absorber
Inspect the rear shock absorber for damage and oil
leakage, and absorber bushing for wear and damage. If
any defect is foun ...
Other materials:
Swingarm bearing removal and installation
Removal
Remove the swingarm. Refer to “swingarm removal and installation” .
Remove the swingarm pivot bearings (1) using the
special tool.
Special tool
(a):
09921–20240 (bearing remover set)
Remove the center spacer (2).
Remove the cushion lever bearing (3) usin ...
Schematic and routing diagram
Engine lubrication system chart diagram
Engine lubrication circuit diagram
...
Fuel tank construction
Fuel tank heat
shield
: aluminum film side should face the engine side.
Fuel tank front cover
Fuel tank front bracket
Velcro fastenings
: clean the adhesive surface before adhering
the velcro fastenings.
Insert
to the bracket.
Apply
...