
Suzuki GSX-R 1000 Service Manual: Sds check
Using sds, sample the data at the time of new and periodic vehicle inspections.
After saving the sampled data in the computer, file them by model and by user.
The periodically filed data help improve the accuracy of troubleshooting since they can indicate the condition of vehicle functions that has changed with time.
For example, when a vehicle is brought in for service but the troubleshooting of a failure is not easy, comparing the current data value to past filed data value at time of normal condition can allow the specific engine failure to be determined.
Also, in the case of a customer vehicle which is not periodically brought in for service with no past data value having been saved, if the data value of a good vehicle condition have been already saved as a master (std), comparison between the same models helps to facilitate the troubleshooting.
- Remove the front seat. Refer to “exterior parts removal and installation” in section 9d .
- Set up the sds tool. (Refer to the sds operation manual for further details.)
Special tool
 : 09904–41010 (suzuki diagnostic
system set)
 : 99565–01010–020 (cd-rom ver.20)
Note
|
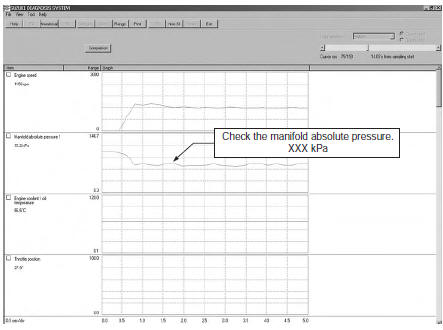
Sample
Data sampled from cold starting through warm-up
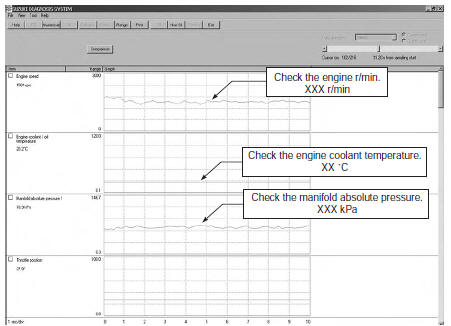
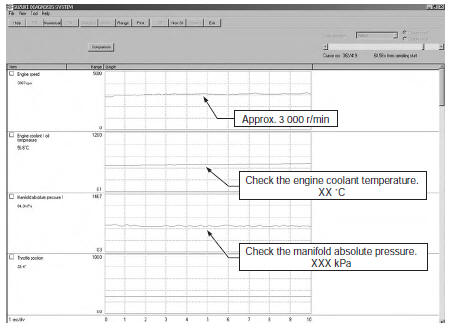
Data at 3 000 r/min under no load
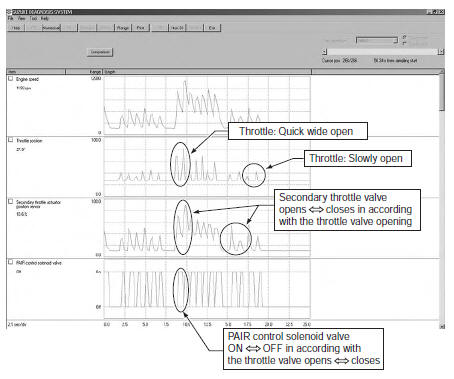
Data at the time of racing
Data of intake negative pressure during idling (100 °c)
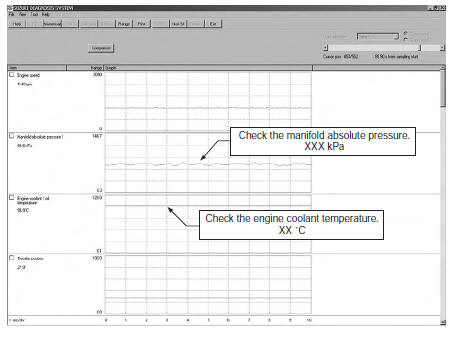
Data of manifold absolute pressure operation at the time of starting
Example of trouble
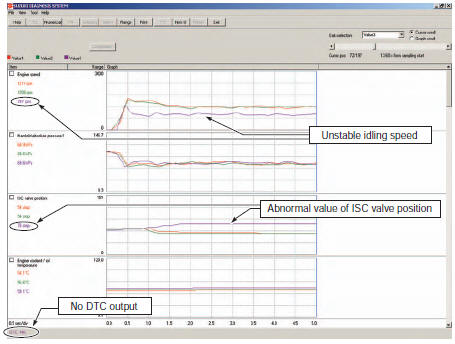
Three data; value 3 (current data 3), value 1 (past data 1) and value 2 (past data 2); can be made in comparison by showing them in the graph. Read the change of value by comparing the current data to the past data that have been saved under the same condition, then you may determine how changes have occurred with the passing of time and identify what problem is currently occurring.
| Note with dtc not output, if the engine idling speed and isc valve stepping position are found to be abnormal than the data saved previously, the possible cause may probably lie in the hardware side such as isc valve air inlet hose crumple, bend, etc. |
 Show data when trouble (displaying data at
the time of DTC)
Show data when trouble (displaying data at
the time of DTC)
Use of sds
Ecm stores the engine and driving conditions (in the form of data as shown in
the figure) at the moment of the
detection of a malfunction in its memory. This data is called “show data w ...
 DTC table
In the lcd (display) panel, the malfunction code is indicated from small code
to large code.
*1 To get the proper signal from the throttle position sensor, the sensor basic
position is ...
Other materials:
Wheel balance check and adjustment
Check and adjust the wheel balance in the following
procedures:
removal the wheel assembly. Refer to “front wheel assembly removal and
installation” and “rear wheel assembly removal and installation” .
Remove the mounting drum from the rear wheel.
(For rear wheel) ref ...
Steering system inspection
Inspect steering system
initially at 1 000 km (600 miles, 2 months) and every
12 000 km (7 500 miles, 24 months) thereafter
Steering should be adjusted properly for smooth turning
of handlebars and safe running. Overtighten steering
prevents smooth turning of the handlebars and too loose
steer ...
DTC “c14” (p0120-h/l): tp sensor circuit
malfunction
Detected condition and possible cause
Detected condition
Possible cause
C14
Output voltage is not within the following
range.
Difference between actual throttle opening
and opening calculated by ecm is larger
than specified value.
0.2 V ≤ Sensor ...