Suzuki GSX-R 1000 Service Manual: Use of sds diagnosis reset procedures
| Note the malfunction code is memorized in the ecm also when the lead wire coupler of any sensor is disconnected. Therefore, when a lead wire coupler has been disconnected at the time of diagnosis, erase the stored malfunction history code using sds. |
- After repairing the trouble, turn off the ignition switch and turn on again.
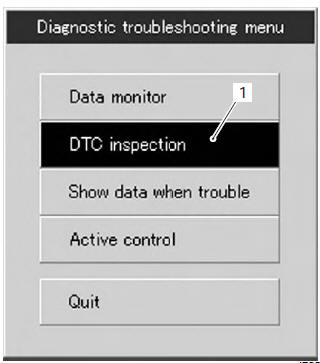
- Click the dtc inspection button (1).
- Check the dtc.
- The previous malfunction history code (past dtc) still remains stored in the ecm. Therefore, erase the history code memorized in the ecm using sds tool.
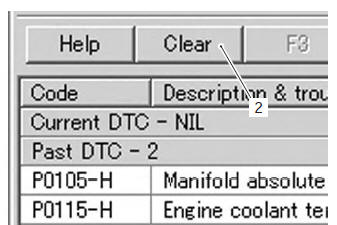
- Click “clear” (2) to delete history code (past dtc).
- Follow the displayed instructions.

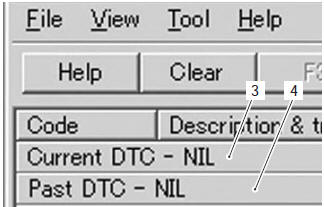
- Check that both “current dtc” (3) and “past dtc” (4) are deleted (nil).
- Close the sds tool and turn the ignition switch off.
- Disconnect the sds tool and install the front seat.
 Self-diagnostic procedures
Use of mode select switch
Note
do not disconnect the coupler from ecm,
battery cable from battery, ecm ground
wire from engine or main fuse before
confirming dtc (diagnos ...
 Show data when trouble (displaying data at
the time of DTC)
Show data when trouble (displaying data at
the time of DTC)
Use of sds
Ecm stores the engine and driving conditions (in the form of data as shown in
the figure) at the moment of the
detection of a malfunction in its memory. This data is called “show data w ...
Other materials:
Cushion rod bearing removal and installation
Removal
Remove the cushion rod. Refer to “cushion rod removal and installation”
.
Remove the cushion rod bearing with the special
tool.
Special tool
(a):
09921–20240 (bearing remover set)
Installation
Caution
the removed bearings must be replaced with
new on ...
Fi system troubleshooting
Customer complaint analysis
Record details of the problem (failure, complaint) and how it occurred as
described by the customer. For this purpose,
use of such an inspection form such as following will facilitate collecting
information to the point required for proper
analysis and diagnosis.
...
Gearshift lever
This motorcycle has a 6-speed
transmission which operates as
shown. To shift properly, squeeze
the clutch lever and close the
throttle at the same time you
operate the gearshift lever. Lift the
gearshift lever to upshift and
depress the lever to downshift.
Neutral is located between lo ...