Suzuki GSX-R 1000 Service Manual: Clutch removal
- Drain engine oil. Refer to “engine oil and filter replacement” in section 0b .
- Lift and support the fuel tank with the prop stay.
Refer to “fuel tank removal and installation” in section 1g .
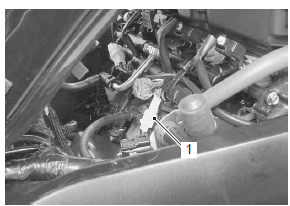
- Disconnect the ckp sensor coupler (1).
- Remove the clutch cover (2).
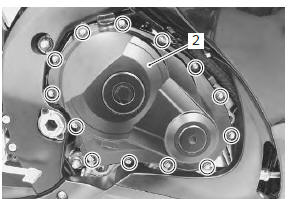
- Remove the gasket (3) and dowel pins.
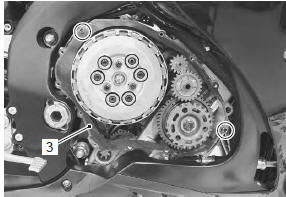
- Remove the clutch springs and pressure plate (4).
| Note loosen the clutch spring set bolts little by little and diagonally. |
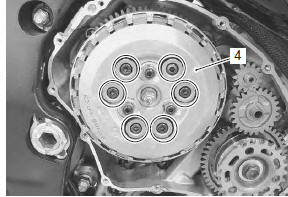
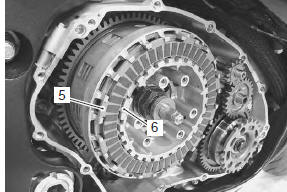
- Remove the clutch drive plates (5) and driven plates (6).
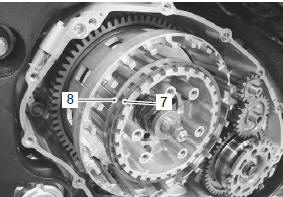
- Remove the spring washer (7) and its seat (8).
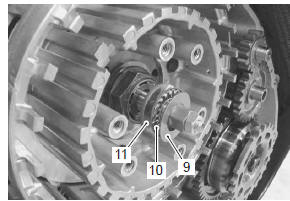
- Remove the thrust washer (9), bearing (10) and clutch push piece (11).
- Remove the clutch push rod (12).
| Note if it is difficult to pull out the push rod (12), use a magnetic hand or wire. |
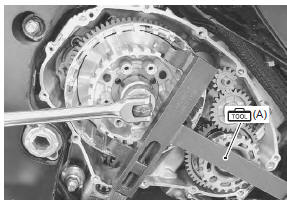
- Unlock the clutch sleeve hub nut.
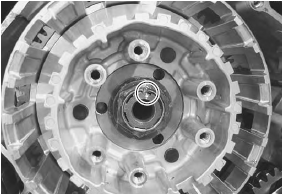
- Hold the clutch sleeve hub with the special tool.
Special tool
 (a): 09920–53740 (clutch sleeve hub
holder)
- Remove the clutch sleeve hub nut.
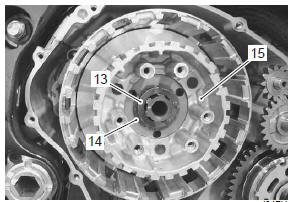
- Remove the spring washer (13), washer (14) and clutch sleeve hub (15).
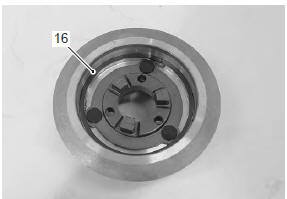
- Remove the seat washer (16) from the clutch sleeve hub.
- Remove the wave spring washers (17) and clutch lifter driven cam (18).
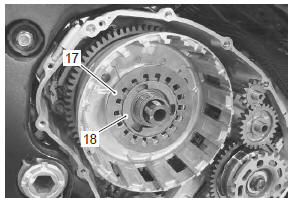
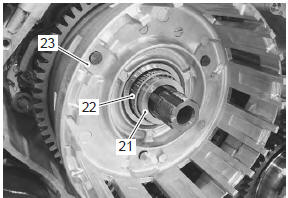
- Remove the clutch lifter drive cam (19) and thrust washer (20).

- Remove the spacer (21) and bearing (22).
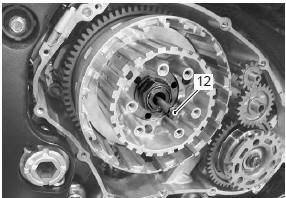
- Remove the primary driven gear assembly (23).
| Note if it is difficult to remove the primary driven gear, rotate the crankshaft. |
 Clutch components
Clutch pressure plate
Clutch push piece
No. 1 Drive plate (8 pcs.)
No. 3 Driven plate (0 – 2 pcs.)
No. 1 Driven plate (5 – 7 pcs.)
No. 2 Driven plate (1 pc.)
...
 Clutch installation
Install the primary driven gear assembly (1).
Caution
if it is difficult to install the primary driven
gear, rotate the crankshaft.
Be sure to engage the oil pump ...
Other materials:
Schematic and routing diagram
Cooling circuit diagram
Water hose routing diagram
Thermostat air bleeder hole
Cushion
O-ring
Radiator heat guard
: be careful not to damage the pawls when removing.
Yellow
marking
White
marking
Clamp end
should face downward
...
Headlight beam adjustment
Adjust the headlight beam, both horizontally and
vertically.
Note
to adjust the headlight beam, adjust the
beam horizontally first, then vertically.
It is not necessary to remove the
combination meter to turn the adjusters.
Horiz ...
Throttle body disassembly and assembly
Refer to “throttle body removal and installation” .
Disassembly
Caution
identify the position of each removed part.
Organize the parts in their respective groups
so that they can be reinstalled in their
original positions.
Disconnect the fuel feed hose (1), isc valve ho ...