Suzuki GSX-R 1000 Service Manual: Muffler / muffler chamber / exhaust pipe removal and installation
Removal
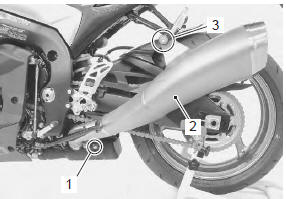
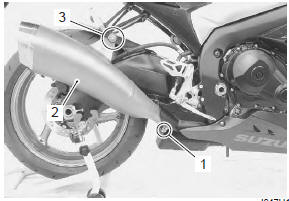
- Loosen the muffler connecting bolts (1).
- Remove the mufflers (2) by removing the mounting bolt and nut (3).
| Note support the muffler to prevent it from falling. |
- Remove the side cowlings. Refer to “exterior parts removal and installation” in section 9d (page 9d- 6).
- Lift and support the fuel tank with the prop stay.
Refer to “fuel tank removal and installation” in section 1g .
- Disconnect the ho2 sensor coupler (4).

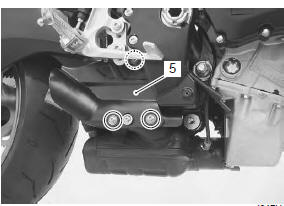
- Remove the muffler chamber heat guard no. 2 (5).
(Rh only)
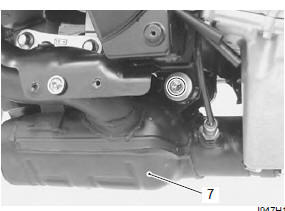
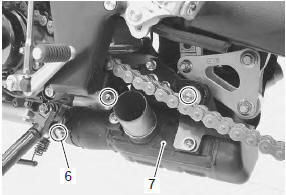
- Loosen the muffler chamber connecting bolt (6).
- Remove the muffler chamber (7).
- Remove the muffler chamber heat guard no. 1 (8) And ho2 sensor (9) from the muffler chamber.
Caution
|

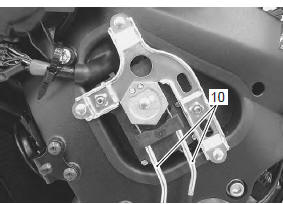
- Remove the excv cables (10). Refer to “excv cable removal and installation” .
- Move the radiator and oil cooler forward. Refer to “radiator inspection and cleaning” in section 1f .
- Remove the exhaust pipe assembly by removing the exhaust pipe bolts.
| Caution take care not to bend the radiator/oil cooler fins. |
| Note support the exhaust pipe assembly to prevent it from falling. |
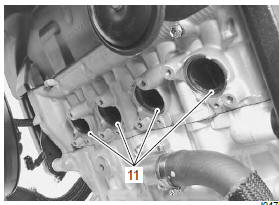
- Remove the exhaust pipe gaskets (11).
Installation
Installation is in the reverse order of removal. Pay attention to the following points:
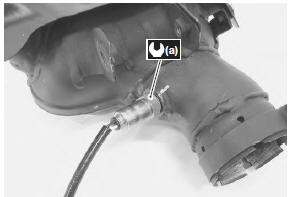
- tighten the ho2 sensor to the specified torque.
Tightening torque ho2 sensor (a): 25 n·m (2.5 Kgf-m, 18.0 Lbf-ft)
Caution
|
- Install new gaskets and connectors and tighten each bolt to the specified torque. Refer to “exhaust system components” .
| Caution replace the gaskets and connectors with new ones. |
| Note when installing a new connector, remove all of the old sealer. Apply the exhaust gas sealer to both the inside and outside of the new connector. |
 : Muffler seal (muffler
seal loctite
5920 (commercially available) or equivalent)
- Install the excva cables. Refer to “excv cable removal and installation” .
 Excva adjustment
Inspect the excva operation and adjust it if necessary
in the following steps:
Step 1
Set the excva to the adjustment position. Refer to
“excv cable removal and installation” (page 1k-
6).
...
 Exhaust system inspection
Inspect the exhaust pipe, muffler chamber and muffler
connection for exhaust gas leakage and mounting
condition. If any defect is found, replace the exhaust
pipe, muffler chamber or muffler with a ...
Other materials:
Rear shock absorber removal and installation
Removal
Remove the right side cowling and side frame covers. Refer to “exterior
parts removal and installation” in section 9d .
Support the motorcycle with a jack to relieve load on
the rear shock absorber.
Remove the left muffler and muffler chamber heat guard no. 2. Refer ...
Crankcase emission control system
description
The engine is equipped with a pcv system to prevent discharging crankcase
emissions into the atmosphere. Blow-by
gas in the engine is constantly drawn into the crankcase, which is returned to
the combustion chamber through the
pcv (breather) hose, air cleaner and throttle body.
...
Special tools and equipment
Recommended service material
Note
required service material is also described in the following.
“Lubrication points”
Special tool
...