Suzuki GSX-R 1000 Service Manual: Battery charging
Initial charging filling electrolyte
| Note when filling electrolyte, the battery must be removed from the vehicle and must be put on the level ground. |
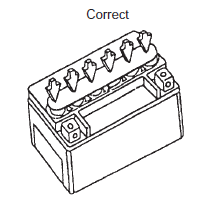
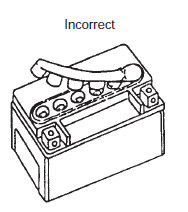
- Remove the aluminum tape (1) which seals the battery filler holes “a”.
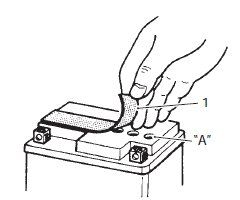
- Remove the caps (2) from the electrolyte container.
Note
|
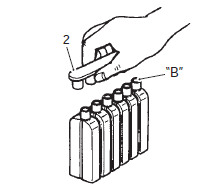
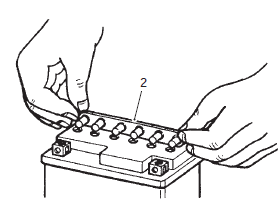
- Insert the nozzles of the electrolyte container (3) into the electrolyte filler holes of the battery.
- Hold the electrolyte container firmly so that it does not fall.
| Note do not allow any of the electrolyte to spill. |

- Make sure that air bubbles (4) rise to the top of each electrolyte container, and leave in this position for about more than 20 minutes.
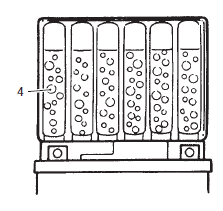
| Note if no air bubbles come out from a filler port, tap the bottom of the electrolyte container two or three times. Never remove the container from the battery. |
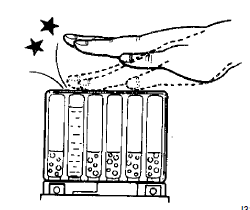
- After confirming that the electrolyte has entered the battery completely, remove the electrolyte containers from the battery.
- Wait for about 20 minutes.
- Insert the caps (2) into the filler holes, pressing in firmly so that the top of the caps do not protrude above the upper surface of the battery’s top cover.
Caution
|
Charging
For initial charging, use the charger specially designed for mf battery.
Caution
|
Battery recharging
| Caution do not remove the caps on the battery top while recharging. |
| Note when the motorcycle is not used for a long period, check the battery every 1 month to prevent the battery discharge. |
- Remove the battery from the motorcycle. Refer to “battery removal and installation” .
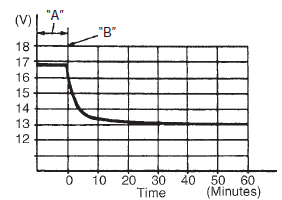
- Measure the battery voltage using the multi-circuit
tester.
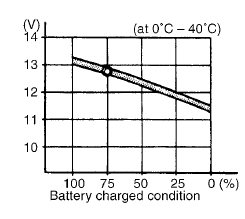
If the voltage reading is less than the 12 v (dc), recharge the battery with a battery charger.
Recharging time 1.2 A for 5 to 10 hours or 5 a for 1 hour
| Caution be careful not to permit the charging current to exceed 5 a at any time. |
- After recharging, wait at least 30 minutes and then
measure the battery voltage using the multi-circuit
tester.
If the battery voltage is less than 12.5 V, recharge the battery again.
If the battery voltage is still less than 12.5 V after recharging, replace the battery with a new one.
|
- Install the battery to the motorcycle. Refer to “battery removal and installation” .
 Battery components
Anode plates
Separator (fiberglass plate)
Cathode plates
Upper cover breather
Stopper
Filter
Terminal
Safety valve
...
 Battery removal and installation
Removal
Remove the front seat. Refer to “exterior parts
removal and installation” in section 9d (page 9d-
6).
Disconnect the battery (–) lead wire (1).
Disconnect the battery ( ...
Other materials:
Battery removal and installation
Removal
Remove the front seat. Refer to “exterior parts
removal and installation” in section 9d (page 9d-
6).
Disconnect the battery (–) lead wire (1).
Disconnect the battery (+) lead wire (2).
Note
be sure to disconnect the battery (–) lead
wire (1) first, th ...
Throtile cable play
This motorcycle has a twin throttle
cable system. Cable A is for pulling
cable and cable B is for
returning.
To adjust the cable play:
Loosen the lock nut 1.
Turn the adjuster 2 so that the
throttle grip has 2.0 - 4.0 Mm
(0.08- 0.16 In) play.Tighten the lock nut 1.
...
Speed sensor inspection
Inspect the speed sensor in the following procedures:
remove the speed sensor. Refer to “speed sensor removal and
installation” .
Connect a 12 v battery (between b and b/w), 10 kù
resistor (between b/r and b) and multi-circuit tester
(tester (+) probe to b and tester ...