
Suzuki GSX-R 1000 Service Manual: Clutch components
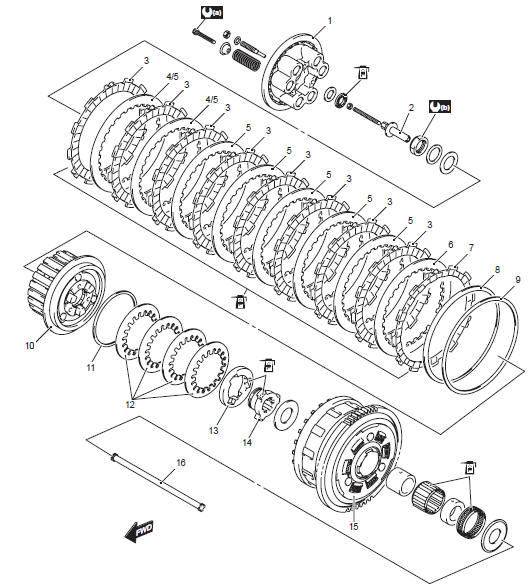
|
 10 N·m (1.0 Kgf-m, 7.0
 95 N·m
 Apply engine oil.
 Clutch control system components
Push rod
Clutch release camshaft
Clutch release arm
Clutch cable
1 N·m (0.1 Kgf-m, 0.7
Lbf-ft)
6 N·m
(0.6 Kgf-m, 4.5 Lbf-ft)
10 N·m
(1.0 ...
 Clutch removal
Drain engine oil. Refer to “engine oil and filter replacement” in
section 0b .
Lift and support the fuel tank with the prop stay.
Refer to “fuel tank removal and installation” in secti ...
Other materials:
Wheel balance check and adjustment
Check and adjust the wheel balance in the following
procedures:
removal the wheel assembly. Refer to “front wheel assembly removal and
installation” and “rear wheel assembly removal and installation” .
Remove the mounting drum from the rear wheel.
(For rear wheel) ref ...
Dimmer / passing light switch inspection
Inspect the dimmer/passing light switch in the following
procedures:
remove the air cleaner box. Refer to “air cleaner box removal and
installation” in section 1d .
Disconnect the left handlebar switch coupler (1).
(Yellow)
Inspect the dimmer/passing light switch ...
DTC “c21” (p0110-h/l): iat sensor circuit
malfunction
Detected condition and possible cause
Detected condition
Possible cause
C21
Output voltage is not with in the following
range.
0.15 V ≤ Sensor voltage < 4.85 V
Iat sensor circuit open or short.
Iat sensor malfunction.
Ec ...