Suzuki GSX-R 1000 Service Manual: Clutch removal
- Drain engine oil. Refer to “engine oil and filter replacement” in section 0b .
- Lift and support the fuel tank with the prop stay.
Refer to “fuel tank removal and installation” in section 1g .
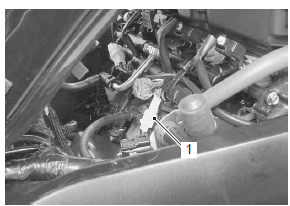
- Disconnect the ckp sensor coupler (1).
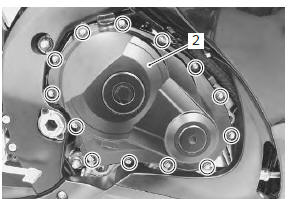
- Remove the clutch cover (2).
- Remove the gasket (3) and dowel pins.
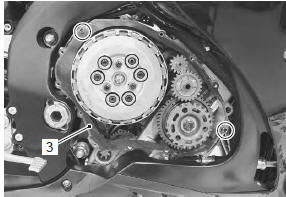
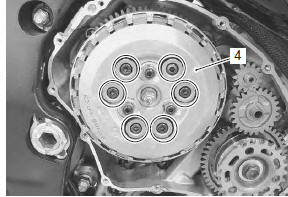
- Remove the clutch springs and pressure plate (4).
| Note loosen the clutch spring set bolts little by little and diagonally. |
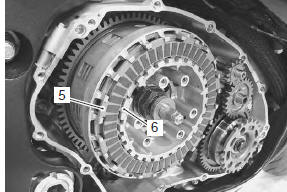
- Remove the clutch drive plates (5) and driven plates (6).
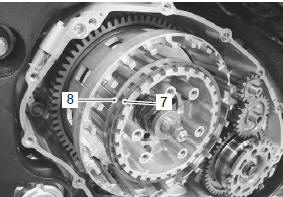
- Remove the spring washer (7) and its seat (8).
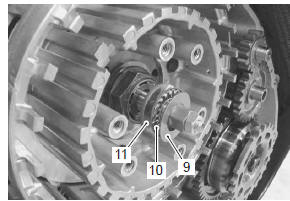
- Remove the thrust washer (9), bearing (10) and clutch push piece (11).
- Remove the clutch push rod (12).
| Note if it is difficult to pull out the push rod (12), use a magnetic hand or wire. |
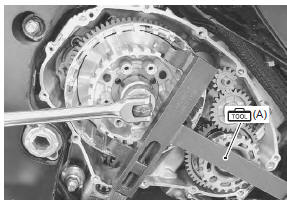
- Unlock the clutch sleeve hub nut.
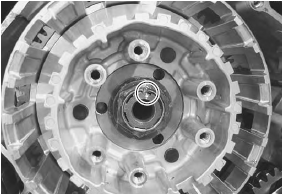
- Hold the clutch sleeve hub with the special tool.
Special tool
 (a): 09920–53740 (clutch sleeve hub
holder)
- Remove the clutch sleeve hub nut.
- Remove the spring washer (13), washer (14) and clutch sleeve hub (15).
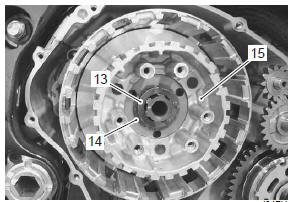
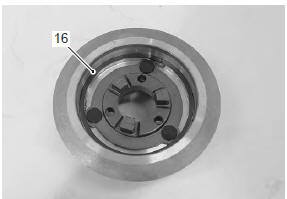
- Remove the seat washer (16) from the clutch sleeve hub.
- Remove the wave spring washers (17) and clutch lifter driven cam (18).
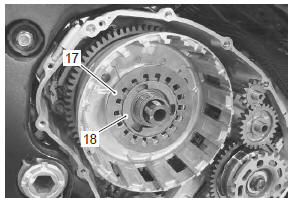
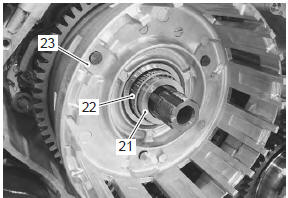
- Remove the clutch lifter drive cam (19) and thrust washer (20).

- Remove the spacer (21) and bearing (22).
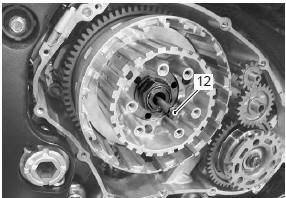
- Remove the primary driven gear assembly (23).
| Note if it is difficult to remove the primary driven gear, rotate the crankshaft. |
 Clutch components
Clutch pressure plate
Clutch push piece
No. 1 Drive plate (8 pcs.)
No. 3 Driven plate (0 – 2 pcs.)
No. 1 Driven plate (5 – 7 pcs.)
No. 2 Driven plate (1 pc.)
...
 Clutch installation
Install the primary driven gear assembly (1).
Caution
if it is difficult to install the primary driven
gear, rotate the crankshaft.
Be sure to engage the oil pump ...
Other materials:
DTC “c91” (p0500): vehicle speed sensor
circuit malfunction
Detected condition and possible cause
Detected condition
Possible cause
Speedometer does not receive signal from the vehicle
speed sensor for more than 6 sec. When the motorcycle is
running. Ecm does not receive signal from the vehicle
speed sensor for more than ...
Self-diagnostic procedures
Use of mode select switch
Note
do not disconnect the coupler from ecm,
battery cable from battery, ecm ground
wire from engine or main fuse before
confirming dtc (diagnostic trouble code)
stored in memory. Such disconnection
may erase memorized information in ec ...
Malfunction code and defective condition table
* : Immobilizer system equipped model only. ...