Suzuki GSX-R 1000 Service Manual: Cushion rod inspection
Refer to “cushion rod removal and installation” .
Collar and spacer
- Remove the collar and spacer from the cushion rod.
- Inspect the collar and spacer for any flaws or other damage. If any defects are found, replace it with a new one.
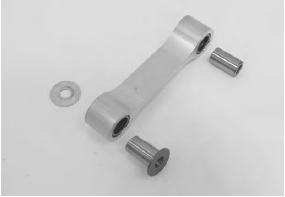
Cushion rod bearing
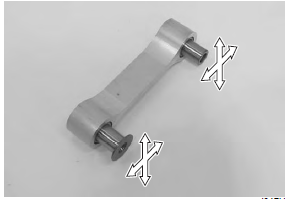
- Insert the collar and spacer into bearing.
- Check the play by moving the collar and spacer up and down. If excessive play is noted, replace the bearing with a new one. Refer to “cushion rod bearing removal and installation” .
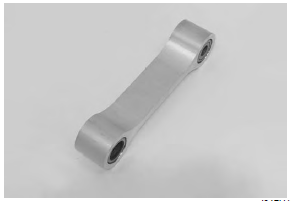
Cushion rod
Inspect the cushion rod for damage. If any defects are found, replace the cushion rod with a new one.
 Cushion rod removal and installation
Removal
Remove the right side cowling and side frame covers. Refer to “exterior
parts removal and installation” in section 9d .
Support the motorcycle with a jack to relieve load on
t ...
 Cushion rod bearing removal and installation
Removal
Remove the cushion rod. Refer to “cushion rod removal and installation”
.
Remove the cushion rod bearing with the special
tool.
Special tool
(a):
09921–20240 (bearing re ...
Other materials:
Throttle body removal and installation
Removal
Remove the side cowlings. Refer to “exterior parts
removal and installation” in section 9d (page 9d-
6).
Remove the air cleaner box. Refer to “air cleaner box removal and
installation” .
Remove the clamps (1).
Disconnect the iap sensor (2) from the vacuum
...
Swingarm bearing removal and installation
Removal
Remove the swingarm. Refer to “swingarm removal and installation” .
Remove the swingarm pivot bearings (1) using the
special tool.
Special tool
(a):
09921–20240 (bearing remover set)
Remove the center spacer (2).
Remove the cushion lever bearing (3) usin ...
Fuel pressure inspection
Keep away from fire or spark.
Spilled gasoline should be wiped off
immediately.
Work in a well-ventilated area.
Inspect the fuel pressure in the following procedures:
lift and support the fuel tank. Refer to “fuel tank removal and
installati ...