Suzuki GSX-R 1000 Service Manual: Radiator / cooling fan motor removal and installation
Removal
- Remove the inner under cowlings. Refer to “exterior parts removal and installation” in section 9d .
- Drain engine coolant. Refer to “cooling system inspection” in section 0b .
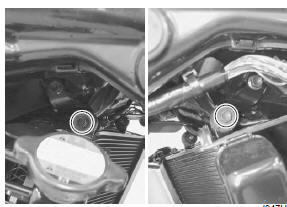
- Disconnect the reservoir tank inlet hose (1) and water air bleed hose (2).
- Remove the radiator reservoir tank (3).
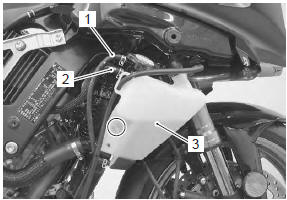
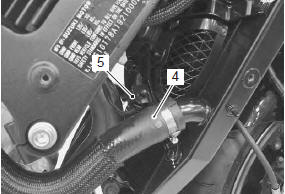
- Disconnect the radiator inlet hose (4).
- Disconnect the cooling fan motor coupler (5).
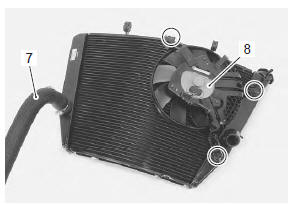
- Remove the oil cooler (6) from the bracket.
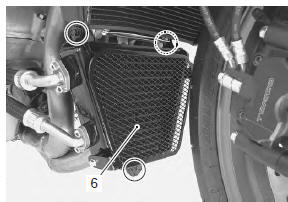
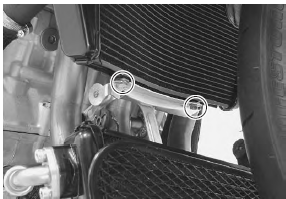
- Remove the radiator assembly by removing the bolts.
- Remove the radiator outlet hose (7) and cooling fan motor (8) from the radiator.
Installation
Install the radiator in the reverse order of removal. Pay attention to the following points:
- install the radiator and oil cooler to their bracket. Refer to “radiator inspection and cleaning” .
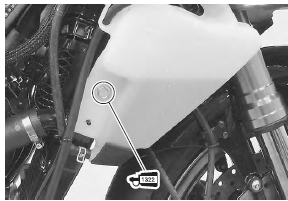
- Apply thread lock to the reservoir tank bolt and tighten it securely.
 : Thread lock cement
99000–32110
(thread lock cement super “1322” or
equivalent)
- Connect the radiator hoses securely. Refer to “water hose routing diagram” .
- Pour engine coolant. Refer to “cooling system inspection” in section 0b .
- Bleed air from the cooling circuit. Refer to “cooling system inspection” in section 0b .
 Radiator inspection and cleaning
Radiator hose inspection
Refer to “cooling system inspection” in section 0b .
Radiator inspection
Inspect the radiator for water leaks. If any defects are
found, replace the radiator with a new on ...
 Water hose inspection
Inspect the water hoses in the following procedures:
remove the side cowlings. Refer to “exterior parts
removal and installation” in section 9d (page 9d-
6).
Check the water hose ...
Other materials:
Drive chain cleaning and
oiling
Clean and oil the chain as follows:
Wash the chain with kerosene.
Kerosene will lubricate and
clean the chain.
Warning
Kerosene can be hazardous .
Kerosene is flammable. Children
or pets may be harmed
from contact with kerosene.
Keep flames and smoking
mater ...
Rear shock absorber removal and installation
Removal
Remove the right side cowling and side frame covers. Refer to “exterior
parts removal and installation” in section 9d .
Support the motorcycle with a jack to relieve load on
the rear shock absorber.
Remove the left muffler and muffler chamber heat guard no. 2. Refer ...
Headlight bulb and position light bulb
replacement
Caution
when you touch the bulb with your bare
hands, clean the bulb with a cloth moistened
with alcohol or soap water to prevent
premature bulb failure.
Low beam bulb
Remove the combination meter. Refer to “combination meter removal and
installation” in section 9c .
...