Suzuki GSX-R 1000 Service Manual: Sprocket mounting drum dust seal / bearing removal and installation
Removal
- Remove the rear wheel assembly. Refer to “rear wheel assembly removal and installation” in section 2d .
- Remove the rear sprocket mounting drum assembly (1). Refer to “rear sprocket / rear sprocket mounting drum removal and installation” (page 3a- 3).
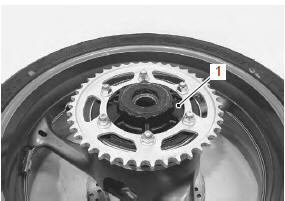
- Remove the retainer (2).
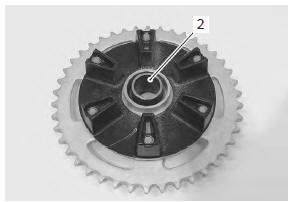
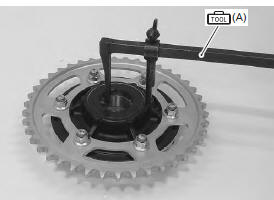
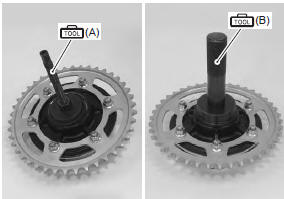
- Remove the sprocket mounting drum dust seal with the special tool.
Special tool
 (a): 09913–50121 (oil seal
remover)
- Remove the sprocket mounting drum bearing with the special tool.
Special tool
 (b): 09921–20240 (bearing remover
set)

Installation
| Caution the removed dust seal and bearing must be replaced with new ones. |
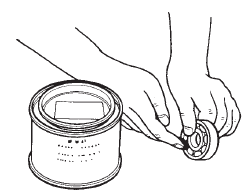
- Apply grease to the bearing before installing.
 : Grease 99000–25010 (suzuki
super
grease “a” or equivalent)
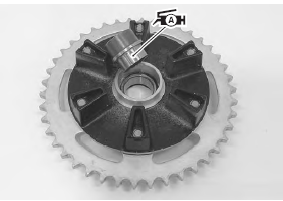
- Install the bearing and dust seal to the sprocket mounting drum with the special tools.
| Caution the sealed cover of the bearing must face wheel hub side. |
Special tool
 (a): 09924–84510 (bearing
installer set)
 (b): 09913–70210 (bearing
installing set (10
– 75 Ô))
- Apply grease to the retainer.
 : Grease 99000–25010 (suzuki
super
grease “a” or equivalent)
- Install the rear sprocket mounting drum assembly to rear wheel hub. Refer to “rear sprocket / rear sprocket mounting drum removal and installation” .
- Install the rear wheel assembly. Refer to “rear wheel assembly removal and installation” in section 2d .
 Drive chain related parts inspection
Refer to “rear sprocket / rear sprocket mounting drum removal and
installation” .
Dust seal
Inspect the dust seal for wear or damage. If any damage
is found, replace the dust seal with a new one. ...
 Drive chain replacement
Use the special tool in the following procedures, to cut
and rejoin the drive chain.
Note
when using the special tool, apply a small
quantity of grease to the threaded parts of
the s ...
Other materials:
Gearshift shaft oil seal / bearing removal and installation
Removal
Remove the gearshift shaft. Refer to “gearshift shaft / gearshift cam
plate removal and installation” .
Remove the gearshift shaft oil seal (1).
Remove the bearings (2) and (3) with the special
tools.
Special tool
(a): 09921–20210 (bearing remover
(12
mm))
...
DTC “c28” (p1655): secondary throttle
valve actuator (stva) malfunction
Detected condition and possible cause
Detected condition
Possible cause
The operation voltage does not reach the stva.
Ecm does not receive communication signal from the
stva. Stva can not operate properly or its motor locked
Stva malfunction.
...
Side-stand removal and installation
Removal
Support the motorcycle with a jack or wooden block.
Caution
do not support the motorcycle with the exhaust pipes.
Make sure that the motorcycle is supported securely.
Remove the side-stand as shown in the side-stand construction.
Refer to ...