Suzuki GSX-R 1000 Service Manual: Swingarm bearing removal and installation
Removal
- Remove the swingarm. Refer to “swingarm removal and installation” .
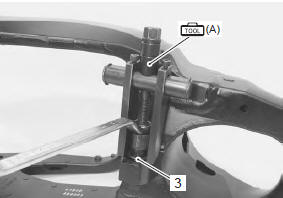
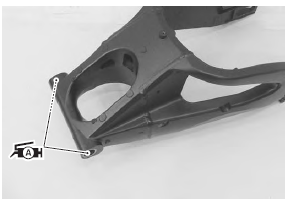
- Remove the swingarm pivot bearings (1) using the special tool.
Special tool

(a):
09921–20240 (bearing remover set)

- Remove the center spacer (2).
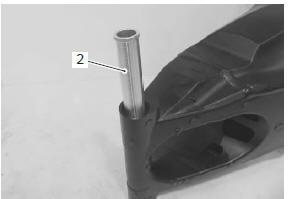
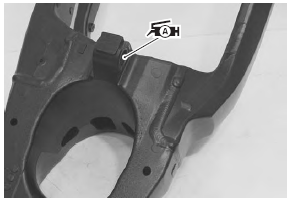
- Remove the cushion lever bearing (3) using the special tool.
Special tool

(a):
09921–20240 (bearing remover set)
Installation
| Caution the removed bearings must be replaced with new ones. |
- Install the center spacer.
- Press the pivot bearings into the swingarm pivot to the depth “a” of 0 – 0.5 Mm (0 – 0.02 In) from the edge with the special tool and suitable size socket wrench.
| Note when installing the bearing, stamped mark on the bearing must face outside and apply a small quantity of the grease to housing. |
 : Grease 99000–25010 (suzuki
super
grease “a” or equivalent)
Special tool
(a): 09941–34513 (bearing
installer)
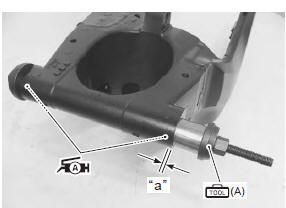
|
- Press the cushion lever bearing into the swingarm to the depth “b” of 1.5 Mm (0.06 In) from the edge with the special tool and suitable size socket wrench.
| Note apply a small quantity of the grease to housing when installing the bearing. |
: Grease 99000–25010 (suzuki
super
grease “a” or equivalent)
Special tool
(b): 09924–84521 (bearing
installer set)
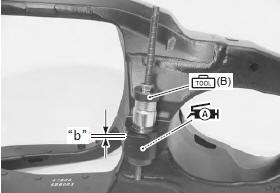
|
- Apply grease to the bearings.
: Grease 99000–25010 (suzuki
super
grease “a” or equivalent)
- Install the swingarm. Refer to “swingarm removal and installation” .
 Swingarm related parts inspection
Refer to “swingarm removal and installation” (page 2c-
9).
Spacers
Remove the collar and spacer from the swingarm.
Inspect the collars and spacer for wear and damage.
If any defects ...
 Specifications
Service data
Suspension
unit: mm (in)
Tightening torque specifications
Note
the specified tightening torque is described in the following.
“Rear suspension components” ...
Other materials:
Steering system inspection
Inspect steering system
initially at 1 000 km (600 miles, 2 months) and every
12 000 km (7 500 miles, 24 months) thereafter
Steering should be adjusted properly for smooth turning
of handlebars and safe running. Overtighten steering
prevents smooth turning of the handlebars and too loose
steer ...
Rear wheel assembly construction
Rear sprocket nut
Rear axle nut
Brake disc bolt
Clearance
60 N·m (6.0 Kgf-m,
43.0 Lbf-ft)
100 N·m
(10 kgf-m, 72.5 Lbf-ft)
35 N·m
(3.5 Kgf-m, 25.5 Lbf-ft)
Apply grease.
Apply thread lock to the
thread part.
...
Maintenance schedule
It is very important to inspect and
maintain your motorcycle regularly.
Follow the guidelines in the
chart. The intervals between periodic
services in kilometers, miles
and months are shown. At the
end of each interval, be sure to
perlorm the maintenance listed.
Warning
Improper ...