Suzuki GSX-R 1000 Service Manual: Swingarm related parts inspection
Refer to “swingarm removal and installation” (page 2c- 9).
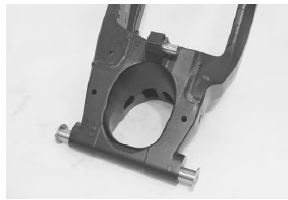
Spacers
- Remove the collar and spacer from the swingarm.
- Inspect the collars and spacer for wear and damage.
If any defects are found, replace them with new ones.
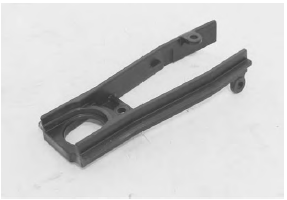
Chain buffer
Inspect the chain buffer for wear and damage. If any defect is found, replace the chain buffer with a new one.
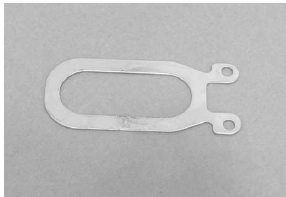
Plate
Inspect the plate for damage and excessive bend. If any defect is found, replace the plate with a new one.
Swingarm bearing
- Insert the collars and spacer into bearings.
- Check the play by moving the collars and spacer up and down. If excessive play is noted, replace the bearings with new ones. Refer to “swingarm bearing removal and installation” .
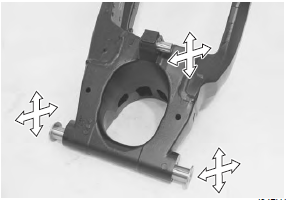
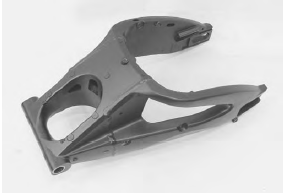
Swingarm
Inspect the swingarm for damage. If any defect is found, replace the swingarm with a new one.
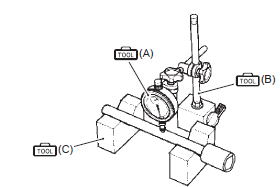
Swingarm pivot shaft
Measure the swingarm pivot shaft runout using the dial gauge. If the runout exceeds the service limit, replace the pivot shaft.
Special tool
 (a): 09900–20607 (dial gauge)
 (b): 09900–20701 (dial gauge
chuck)
 (c): 09900–21304 (v blocks)
Swingarm pivot shaft runout service limit: 0.3 Mm (0.01 In)
 Swingarm pivot boss removal and installation
Removal
Remove the swingarm. Refer to “swingarm removal and installation” .
Remove the swingarm pivot boss nut (1).
Note
remove the swingarm pivot boss only when
replacing ...
 Swingarm bearing removal and installation
Removal
Remove the swingarm. Refer to “swingarm removal and installation” .
Remove the swingarm pivot bearings (1) using the
special tool.
Special tool
(a):
09921–20240 (bearing re ...
Other materials:
Specifications
Service data
Drive train
unit: mm (in) except ratio
Tightening torque specifications
Note
the specified tightening torque is described in the following.
“Transmission components” “gearshift lever construction”
“gearshift shaft / gearshift cam plate componen ...
Iat sensor removal and installation
Removal
Remove the air cleaner box. Refer to “air cleaner box removal and
installation” in section 1d .
Remove the iat sensor (1) from the air cleaner box.
Installation
Install the iat sensor in the reverse order of removal.
Pay attention to the following point:
t ...
Fuel pump inspection
Turn the ignition switch on and check that the fuel pump
operates for a few seconds.
If the fuel pump motor does not make operating sound, inspect the fuel pump
circuit connections or inspect the fuel pump relay and to sensor. Refer to “fuel
pump relay inspection” and “dtc “c23” (p1651 ...