Suzuki GSX-R 1000 Service Manual: Air cleaner element removal and installation
Removal
- Lift and support the fuel tank. Refer to “fuel tank removal and installation” in section 1g (page 1g- 9).
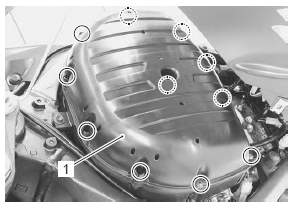
- Remove the air cleaner box cover (1).
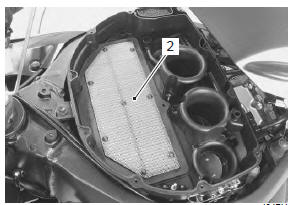
- Remove the air cleaner element (2).
Installation
Installation is in the reverse order of removal.
 Engine components removable with the
engine in place
Engine components removable with the
engine in place
Engine components which can be removed while the engine is installed on the
frame are as follows. For the installing
and removing procedures, refer to respective paragraphs describing each
compon ...
 Air cleaner box removal and installation
Removal
Lift and support the fuel tank. Refer to “fuel tank
removal and installation” in section 1g (page 1g-
9).
Remove the air cleaner box cover. Refer to “air cleaner element remova ...
Other materials:
Front wheel related parts inspection
Refer to “front wheel assembly removal and installation” .
Tire
Refer to “tire inspection” in section 0b .
Front brake disc
Refer to “front brake disc inspection” in section 4b .
Dust seal
Inspect the lip of dust seals for wear or damage. If any
defects are found, replace the dust seal ...
Engine coolant temperature indicator light inspection
Inspect the engine coolant temperature meter and indicator light (led) in the
following procedures:
remove the left side cowling. Refer to “exterior parts removal and
installation” in section 9d .
Disconnect the ect sensor coupler (1).
Connect a variable resistor (2) ...
Exhaust control system construction
Excv cable no. 1 (Cl)
Excv cable no. 2 (Op)
When
loosening or tightening the pulley bolt, be sure to fix the
pulley with an adjustable wrench, or excva may get damaged.
5 N·m (0.5 Kgf-m, 3.5 Lbf-ft)
42 – 43 Mm (1.65 – 1.69 In)
60 – 61 Mm (2.36 – ...