Suzuki GSX-R 1000 Service Manual: Pair control solenoid valve removal and installation
Removal
- Lift and support the fuel tank with the prop stay.
Refer to “fuel tank removal and installation” in section 1g .
- Remove the air cleaner box. Refer to “air cleaner box removal and installation” in section 1d .
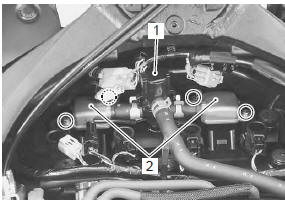
- Remove the pair control solenoid valve (1) along with the pair reed valve covers (2).
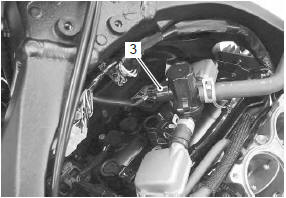
- Disconnect the pair control solenoid valve coupler (3).
- Disconnect the pair hoses (4).
Installation
Installation install the pair control solenoid valve in the reverse order of removal. Pay attention to the following point:
- connect the pair hoses properly. Refer to “pair system hose routing diagram” .
 Pair reed valve removal and installation
Removal
Lift and support the fuel tank with the prop stay.
Refer to “fuel tank removal and installation” in section 1g .
Remove the air cleaner box. Refer to “air cleaner box removal and ...
 Pair system inspection
Pair hose
Lift and support the fuel tank with the prop stay.
Refer to “fuel tank removal and installation” in section 1g .
Remove the air cleaner box. Refer to “air cleaner box removal a ...
Other materials:
Air cleaner
The air cleaner element must be
kept clean to provide good engine
power and g1as mileage. If you use
your motorcycle under normal
low-stress conditions, you should
service the air cleaner at the intervals
specified. If you ride in dusty,
wet, or muddy conditions, you will
need to inspect the ...
Throttle valve synchronization
Check and adjust the throttle valve synchronization
among four cylinders.
Start the engine and run it in idling condition
for
warming up.
Stop the warmed-up engine.
Lift and support the fuel tank. Refer to “fuel
tank
removal and installation” in section 1g (page ...