Suzuki GSX-R 1000 Service Manual: Sprocket mounting drum dust seal / bearing removal and installation
Removal
- Remove the rear wheel assembly. Refer to “rear wheel assembly removal and installation” in section 2d .
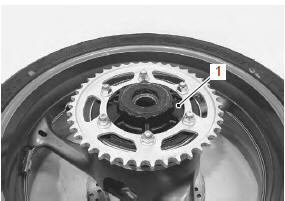
- Remove the rear sprocket mounting drum assembly (1). Refer to “rear sprocket / rear sprocket mounting drum removal and installation” (page 3a- 3).
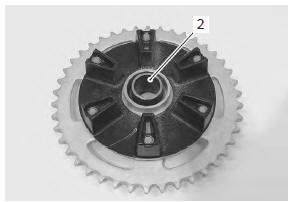
- Remove the retainer (2).
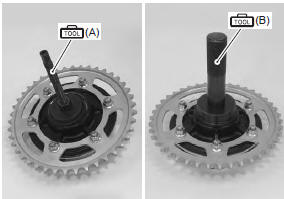
- Remove the sprocket mounting drum dust seal with the special tool.
Special tool
 (a): 09913–50121 (oil seal
remover)
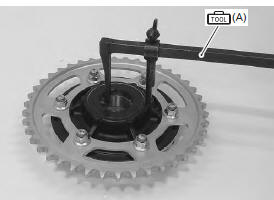
- Remove the sprocket mounting drum bearing with the special tool.
Special tool
 (b): 09921–20240 (bearing remover
set)

Installation
| Caution the removed dust seal and bearing must be replaced with new ones. |
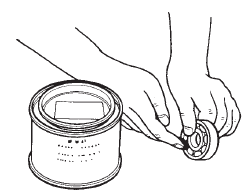
- Apply grease to the bearing before installing.
 : Grease 99000–25010 (suzuki
super
grease “a” or equivalent)
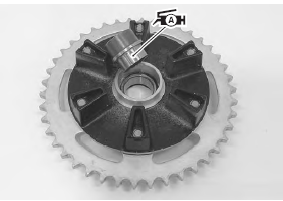
- Install the bearing and dust seal to the sprocket mounting drum with the special tools.
| Caution the sealed cover of the bearing must face wheel hub side. |
Special tool
 (a): 09924–84510 (bearing
installer set)
 (b): 09913–70210 (bearing
installing set (10
– 75 Ô))
- Apply grease to the retainer.
 : Grease 99000–25010 (suzuki
super
grease “a” or equivalent)
- Install the rear sprocket mounting drum assembly to rear wheel hub. Refer to “rear sprocket / rear sprocket mounting drum removal and installation” .
- Install the rear wheel assembly. Refer to “rear wheel assembly removal and installation” in section 2d .
 Drive chain related parts inspection
Refer to “rear sprocket / rear sprocket mounting drum removal and
installation” .
Dust seal
Inspect the dust seal for wear or damage. If any damage
is found, replace the dust seal with a new one. ...
 Drive chain replacement
Use the special tool in the following procedures, to cut
and rejoin the drive chain.
Note
when using the special tool, apply a small
quantity of grease to the threaded parts of
the s ...
Other materials:
Exhaust control system description
The exhaust control system (excs) consists of the exhaust control valve (excv),
exhaust control valve actuator
(excva) and exhaust control valve cables (excv cables).
Excv is installed in the exhaust pipe. Excva is mounted inside of the right
frame. The excv is operated by the
excva via the ...
Ignition switch
The ignitionr switch has 4 positions:
"Off" position
All electrical circuits are cut off.
The engine will not start. The key
can be removed.
"On" position
The ignition circuit is completed
and the engine can run. The
headlight and taillight will automatically
turn ...
Self-diagnostic procedures
Use of mode select switch
Note
do not disconnect the coupler from ecm,
battery cable from battery, ecm ground
wire from engine or main fuse before
confirming dtc (diagnostic trouble code)
stored in memory. Such disconnection
may erase memorized information in ec ...