Suzuki GSX-R 1000 Service Manual: Fuel pump disassembly and assembly
Disassembly
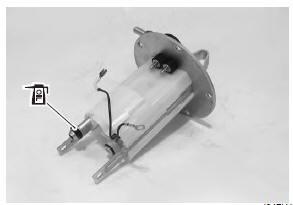
- Remove the fuel tank. Refer to “fuel tank removal and installation” .
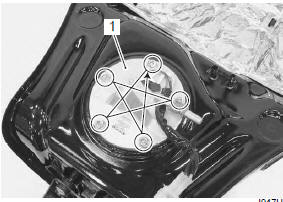
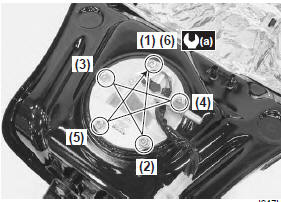
- Remove the fuel pump assembly (1) by removing its mounting bolts diagonally.
|
|

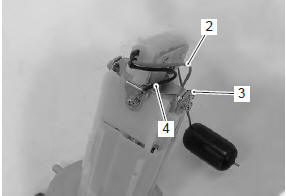
- Disconnect the lead wires (2).
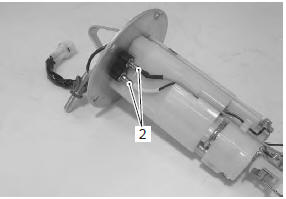
- Remove the fuel level gauge (3).
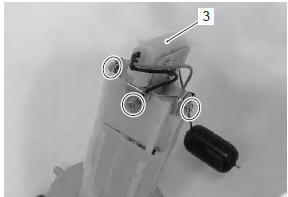
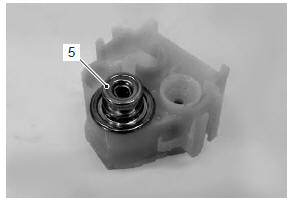
- Remove the fuel pressure regulator assembly (4).
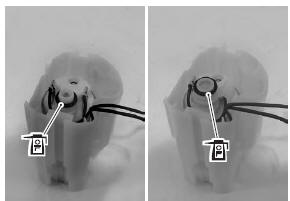
| Caution never remove the fuel pressure regulator (5) from the holder. |
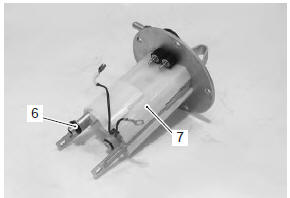
- Remove the o-ring (6) and fuel pump case (7).
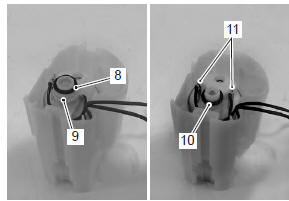
- Remove the o-ring (8) and joint (9).
- Remove the o-ring (10) and lead wires (11).
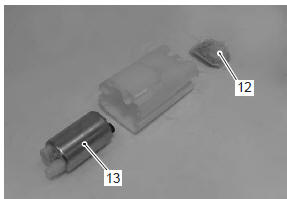
- Remove the fuel mesh filter (12).
- Remove the fuel pump (13).
Assembly
Refer to “fuel mesh filter inspection and cleaning” .
Assemble the fuel tank pump in the reverse order of the disassembly. Pay attention to the following points:
Caution
|
| Caution connect all lead wires securely so as not to cause contact failure. |

|
- Install a new o-ring and apply grease to it.
 : Grease 99000–25010 (suzuki
super
grease “a” or equivalent)
 The o-ring The o-ring
must be replaced with a new one to prevent fuel leakage. |
- When installing the fuel pump assembly, first tighten all the fuel pump mounting bolts lightly and then to the specified torque in the ascending of numbers.
Tightening torque fuel pump mounting bolt (a): 10 n·m (1.0 Kgf-m, 7.0 Lbf-ft)
 Fuel pump components
Fuel level gauge
Fuel pressure regulator assembly
O-ring
Joint
Fuel pump
Fuel pump case
Fuel mesh filter
10
N·m (1.0 Kgf-m, 7.0 Lbf-ft)
Appl ...
 Fuel mesh filter inspection and cleaning
Inspect the fuel mesh filter in the following procedures:
remove the fuel mesh filter. Refer to “fuel pump disassembly and
assembly” .
If the fuel mesh filter is clogged with fore ...
Other materials:
Specifications
Service data
Fi sensors
Tightening torque specifications
Note
the specified tightening torque is described in the following.
“Exhaust control system construction” “exhaust system components”
Reference: for the tightening torque of fastener not specified in this ...
Ect sensor removal and installation
Removal
Remove the left side cowling. Refer to “exterior parts removal and
installation” in section 9d .
Drain engine coolant. Refer to “cooling system inspection” in section
0b .
Disconnect the coupler and remove the ect sensor
(1).
Caution
take special care ...
Starter motor will not run
Note
make sure the fuses are not blown and the battery is fully-charged
before diagnosing.
Troubleshooting
Step
Action
Yes
No
1
Shift the transmission into neutral.
Grasp the clutch lever, turn on the ignition switch ...