Suzuki GSX-R 1000 Service Manual: Fuel tank construction
|
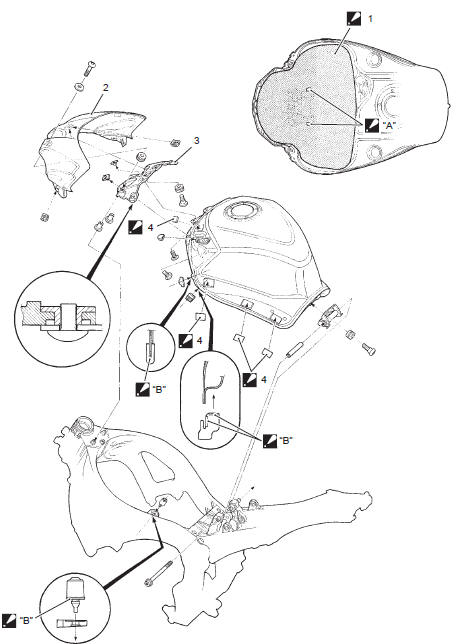
 Fuel tank heat
 Velcro fastenings
 Insert
 Apply
Apply
 Fuel pump relay inspection
Refer to “electrical components location” in section 0a .
Inspect the fuel pump relay in the following procedures:
remove the frame covers. Refer to “exterior parts
removal and installa ...
 Fuel tank removal and installation
Removal
Keep away from fire or spark.
Spilled gasoline should be wiped off
immediately.
Work in a well-ventilated area.
Remove the front s ...
Other materials:
Special tools and equipment
Recommended service material
Note
required service material is also described in the following.
“Front brake master cylinder components” “rear brake master
cylinder components” “rear brake pedal construction”
Special tool
...
The sport of motorcycling
Your motorcycle and this owner's
manual have been designed by
people like you who enjoy motorcycling.
People become motorcyclists
for many reasons. For
starters, street riding is fun and
invigorating. But no matter why
you became a motorcyclist, or
how experienced you are, you will
eventu ...
Tightening torque specifications
Note
the specified tightening torque is described in the following.
“Throttle cable routing diagram” “throttle body components”
“throttle body construction” “engine assembly installation”
Reference: for the tightening torque of fastener not specified i ...