
Suzuki GSX-R 1000 Service Manual: Transmission removal
- Remove the engine assembly from the frame. Refer to “engine assembly removal” in section 1d .
- Remove the engine top side. Refer to “engine top side disassembly” in section 1d .
- Separate the upper and lower crankcases. Refer to “engine bottom side disassembly” in section 1d .
Countershaft assembly
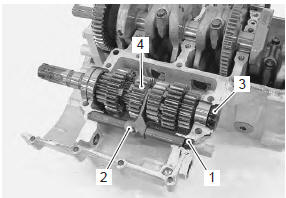
- Remove the gearshift shaft plug (1) and gearshift fork/gearshift shaft (2).
- Remove the clutch push rod oil seal (3) and countershaft assembly (4).
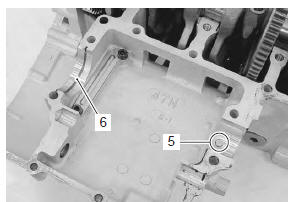
- Remove the bearing pin (5) and c-ring (6).
Gearshift fork and gearshift cam
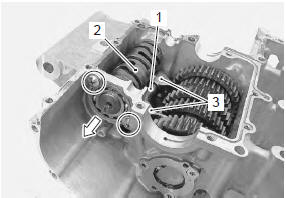
- Remove the gearshift cam bearing retainer screws.
- Remove the gearshift fork shaft (1).
- Remove the gearshift cam (2) along with its bearing.
- Remove the gearshift forks (3).
Driveshaft assembly
- Remove the spacer (1).
- Remove the driveshaft oil seal retainer (2).
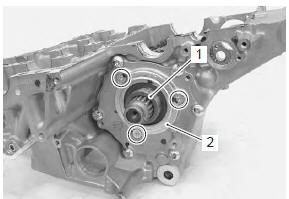
- Remove the driveshaft left bearing case bolts.
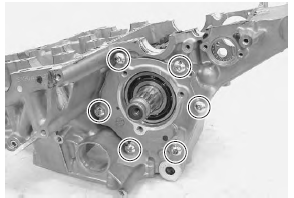
- Using suitable size bolts (3), remove the driveshaft left bearing case (4).
- Remove the dowel pin.
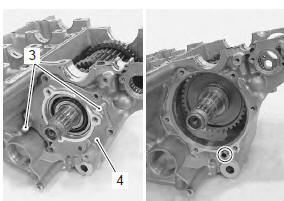
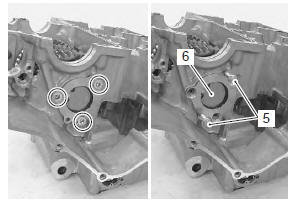
- Remove the driveshaft right bearing case bolts.
- Using suitable size bolts (5), remove the driveshaft right bearing assembly (6).
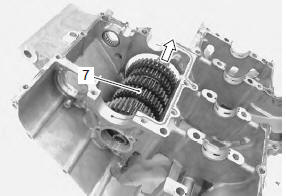
- Remove the driveshaft assembly (7).
Bearing and oil seal
| Note if there is no abnormal condition, the oil seal and bearing removal is not necessary. |
| Caution the removed oil seal and bearing must be replaced with a new one. |
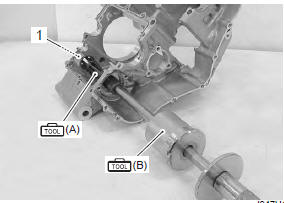
- Remove the gearshift cam bearing (1) with the special tools.
| Caution be careful not to lean the bearing remover. |
Special tool
 (a): 09923–74511 (bearing remover)
 (b): 09930–30104 (rotor remover
sliding
shaft)
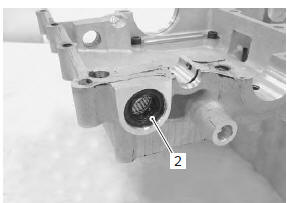
- Remove the gearshift shaft oil seal (2). (Lh only)
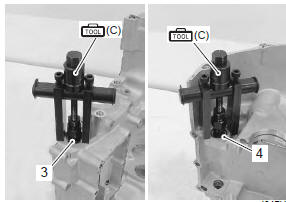
- Remove the gearshift shaft bearings (3) and (4) with the special tool.
Special tool
 (c): 09921–20240 (bearing remover
set)
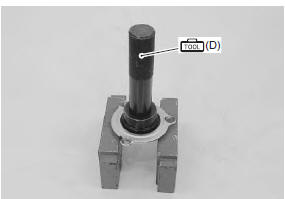
- Remove the driveshaft left bearing with the special tool.
Special tool
 (d): 09913–70210 (bearing
installing set (10
– 75 Ô))
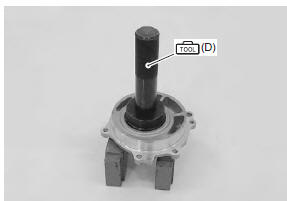
- Remove the driveshaft left bearing oil seal from the retainer using the special tool.
Special tool
( d): 09913–70210 (bearing
installing set (10
– 75 Ô))
 Transmission components
2Nd drive gear
6Th drive gear
3Rd/4th drive gear
5Th drive gear
Countershaft/1st drive gear
Driveshaft
2Nd driven gear
6Th driven gear
3Rd driven ge ...
 Transmission installation
Install the transmission in the reverse order of removal.
Pay attention to the following points:
Bearing and oil seal
Caution
replace the removed bearings and oil seals
with new ones ...
Other materials:
Cushion rod bearing removal and installation
Removal
Remove the cushion rod. Refer to “cushion rod removal and installation”
.
Remove the cushion rod bearing with the special
tool.
Special tool
(a):
09921–20240 (bearing remover set)
Installation
Caution
the removed bearings must be replaced with
new on ...
Rear seat
The seat lock is located under the
left frame cover. To remove the
rear seat, insert the ignition key
into the lock and turn it clockwise.
Raise the front end of the seat
and slide it forward.
To reinstall the seat, slide the seat hooks into the seat hook retainers and
push down firm ...
Specifications
Service data
Injector + fuel pump + fuel pressure regulator
Fuel
Tightening torque specifications
Note
the specified tightening torque is described in the following.
“Fuel pump components”
Reference: for the tightening torque of fastener not specified in this
se ...