Suzuki GSX-R 1000 Service Manual: Cylinder head cover disassembly and assembly
Disassembly
- Remove the cylinder head cover. Refer to “engine top side disassembly” .
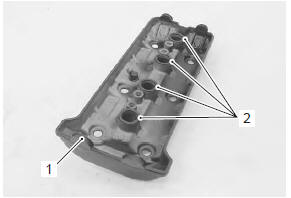
- Remove the gaskets (1) and (2).
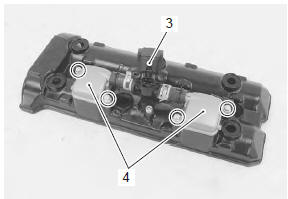
- Remove the pair control solenoid valve (3) along with the pair reed valve covers (4).
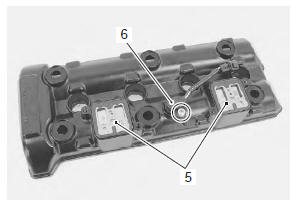
- Remove the pair reed valves (5) and cmp sensor (6).
Assembly
Assembly is in the reverse order of disassembly. Pay attention to the following points:
- install the cmp sensor.
| Note when installing the cmp sensor, clean the sensor surface. |
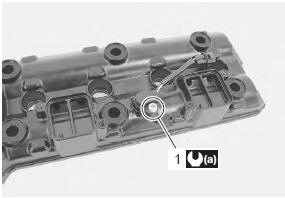
- Tighten the cmp sensor bolt (1) to the specified torque.
Tightening torque cmp sensor bolt (a): 10 n·m (1.0 Kgf-m, 7.0 Lbf-ft)
- Install the pair reed valves.
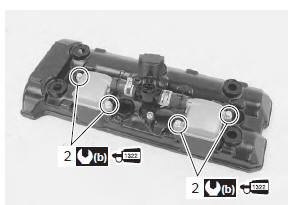
- Apply thread lock to the pair reed valve cover bolts (2) and tighten them to the specified torque.
 : Thread lock cement
99000–32110
(thread lock cement super “1322” or
equivalent)
Tightening torque pair reed valve cover bolt (b): 10 n·m (1.0 Kgf-m, 7.0 Lbf-ft)
- Fit new gaskets and install the cylinder head cover to the cylinder head. Refer to “engine top side assembly” .
 Engine top side assembly
Assemble the engine top side in the reverse order of
disassembly. Pay attention to the following points:
Cylinder head
Install the dowel pins and a new cylinder head gasket
(1) to the cylinder ...
 Cylinder head cover related parts
inspection
Cylinder head cover related parts
inspection
Refer to “engine top side disassembly” .
Refer to “engine top side assembly” .
Refer to “cylinder head cover disassembly and assembly” .
Cylinder head cover
Clean and check the gasket grooves ...
Other materials:
Clutch components
Clutch pressure plate
Clutch push piece
No. 1 Drive plate (8 pcs.)
No. 3 Driven plate (0 – 2 pcs.)
No. 1 Driven plate (5 – 7 pcs.)
No. 2 Driven plate (1 pc.)
No. 2 Drive plate (1 pc.)
Spring washer
Spring washer seat
Clutch sleeve hub
Seat ...
Engine components removable with the
engine in place
Engine components which can be removed while the engine is installed on the
frame are as follows. For the installing
and removing procedures, refer to respective paragraphs describing each
component.
Center of engine
Item
Removal
Inspection
Installation
...
Front brake disc removal and installation
Removal
Remove the front wheel assembly. Refer to “front wheel assembly removal
and installation” in section 2d .
Remove the front brake disc.
Installation
Install the front brake disc in the reverse order of
removal. Pay attention to the following points:
make sure ...